Tuesday, September 26, 2017

Update to the gags

Hi there,

Yet another update to the RealRestraint gags, because why not ?

Actually this one was a bit overdue as there were two bugs I had to fix, and should have fixed sooner than this. Sorry for the wait.

1. The first bug was the Deluxe Gag's chin strap (and its sibling the Deluxe Bridle's chin strap) moving all by itself in laggy areas. As I have explained in this post, the OpenMouth plugin regularly opens the mouth of the system avatar plus plays one Bento animation according to the one the user chose. In the meantime, the chin strap monitors the state of the system mouth and resizes itself accordingly. In very laggy areas, it could lead to issues so I increased a delay in the chin strap script and it seems to have done the trick.

2. The second bug was simply the way the Bento animations were made, well most of them. I made those animations the regular way (they are not animations in fact, just poses), with one keyframe at the beginning and that's it. It just so happens this doesn't work well for some mesh heads. It works for Lelutka, but not for Catwa and Logo for instance, the latter would keep its mouth open when ungagged. Worse, some animations would even deform the head. So I redid them all the same way Keiyra made her OpenMouth/Big/VeryBig animations (which work just fine), now those mesh heads should stop acting up when a gag is unlocked. As a bonus, I have removed the gaunt from all the animations, because it wasn't terribly needed after all. I had made that gaunt so that the strap of a gag would look like digging into the cheeks, but it didn't look good on most people, so it is removed now.

3. As a bonus, I have also slightly modified the OpenMouth plugin so that it displays aliases for the overrides instead of the names of the animations directly. So you will see "Normal" instead of "OpenMouth", "Big" instead of "OpenMouthBig" etc. Its notecard changes accordingly and I will explain below how to get this change without having to replace your gags, because this requires to modify a notecard.


How and what to update

The gags that are impacted by this update are :

* Ball gag
* Ring gag
* Deluxe gag (+ its bridle for fix #2)
* Pretty Mummy gag (main part only)
* Tape gag

As to how to update to get those bugs fixed, this can be little tricky. Please bear with me while I explain.


1. Fix number 1 (the chin strap) requires you to just update your Deluxe Gag, but it won't do anything to fix the Deluxe Bridle as it is a secondary item like a left wrist cuff, the updater does not modify those during a normal update. You will therefore need to fix it yourself. Here is the procedure :

* First make sure you have the update folder in your inventory. You get one by clicking on the updater at one of the locations shown at the end of this post. This folder contains the DeluxeGagChinStrap script mentioned above.


* Res your bridle on the ground and edit it, then go to the Content tab.


* Delete the DeluxeGagChinStrap script from the bridle, and nothing else.


* Drag the DeluxeGagChinStrap script from the folder in your inventory, drop it into the contents of the bridle.


* You're done, no need to reset. Pick up your bridle and it is ready to use. However you will need to reposition the chin strap again once it's locked, since the old script has disappeared with its memory.


2. Fix number two requires you to drop your gag on the ground because it replaces animations, which are not full-perms and are not scripts (duh), so the SL permission system will not allow the updater to directly modify them if the gag is worn. It won't even try, in fact. So rez your gag on the ground and start the update from there.


3. Fix number three cannot be fixed with a normal update, it has to either be a replacement, or a manual fix. Here is how to fix it :

* First update your gag normally, worn or not this won't make any difference (except the updater will complain it cannot download animations, but ignore that, the OpenMouth plugin will be updated anyway).
* Edit your gag, go to the Content tab, which displays all the items contained in it (animations, scripts etc) :


* Double-click on the "*OpenMouth config" notecard to open it :


* Between the lines "overrides" and "default", insert the following line :


aliases = Normal,Big,Very big,Oh,Ah,Ah big

It should look like this :


* Save the notecard, close it then stop editing.

* Click on the gag, go to "Plugins", click on "OpenMouth", then on "Load notecard" :


* That's it, the "Overrides" menu should now show readable and meaningful aliases rather than the names of the animations directly, which were too long for the buttons :


To recap

* Go to one of the locations shown below.
* Click on the updater there, you receive an update folder.
* Rez the update orb contained in that folder.
* Rez one of your gags on the ground.
* Click on it, go to "Tools", press "Save", then "Update".
* Wait.
* Wait some more.
* It can be long.
* Are we there yet ?
* Oh, it's done ? Fantastic.
* Click on your gag again, go to "Tools", press "Load" so your times are restored.
* If you want to do the fix #3 (the aliases), edit your gag, open the notecard as explained above.
* Pick up your gag, rez another one, start over at step 4.


You can find an updater at the following places in-world :

My little shop

Dark Wishes

Roper's Dark Playground

Chorazin's main store

It looks like an orb floating above a pedestal, just click on it and follow the instructions.


Have fun !

Marine

Friday, September 22, 2017

Update to the latex catsuits, bodysuits and socks : Omega support !

Hi there,

I am proud to announce that the Latex Catsuits, the Latex Bodysuits and the Latex socks & gloves are finally compatible with Omega !

Now the same HUD is able to apply latex textures to your mesh body whether it is Maitreya or Omega compatible. And yes it was not supposed to be possible, but I found a way to do it anyway.

Attention, by "Omega compatible" I mean "natively compatible with Omega", that is, the mesh body is compatible with Omega out of the box or you have to install a kit that you buy on the Omega Marketplace store. It is not guaranteed to work with an Omega relay because some Omega relays do not transmit material information from the applier to the mesh body, they are not advanced enough for that. Some relays do, others don't, it depends on the mesh body (at the time of this writing). This is why using an Omega relay with Maitreya used to only apply the base texture and not the shine. So I repeat, if your mesh body needs a relay to work with Omega, and it is not Maitreya, then this update might not be useful for you. You can find out by trying out the demo.

To do this, I have added a new part to each HUD, it looks like this :


Most of these buttons are related to Omega but the two on the left, with the pink "L" in the background, are for Lolas. Unlike before, the HUDs no longer apply to Lolas automatically, you have to do this manually. This leaves you more choice this way, especially since Omega and Lolas protocols conflict with each other (they share the same channel and they are both very similar, but not identical). For example, you might want to apply your catsuit to the "inner" layer of your body, and the Lolas to the outer layer of your Lolas breasts, making your catsuit look loose between the breasts.


If you are a Maitreya user

Nothing changes compared to older versions, simply click on a color button, choose the layer to apply to with the menu that shows and that's it. If you are wearing a neck piece and/or boots, those accessories are immediately painted as well.


If you wear a mesh body and/or breasts compatible with Omega

After clicking on a color button (not before), wait until the HUD says "selected" and what is selected. For example :

MdlM Opaque Latex Socks & Gloves (top left): Selected for torso: "Gloves Black 13 13 13". If you use Omega or Lolas, click one of the layer buttons to apply.

There may be one or two such messages, one for the torso and/or one for the legs, depending on the HUD you use and what you clicked on. For example, clicking on a catsuit button gives you two messages because it prepares the top and bottom textures for Omega and Lolas to use, while clicking on a gloves button or a nipple pasties button only prepares the top textures so you get only one "selected" message.

Once you see that message or those messages in your chat window, the HUD is ready to apply to your Omega-compatible mesh body. Simply press the "Outer", "Inner" or "Tattoo" button to apply to the corresponding layer on your mesh body.

"Outer" means "top" and "pants" at the same time, "Inner" means "bra" and "underwear", and "Tattoo" means "top tattoo" and "bottom tattoo". This is not a problem even for gloves and socks, as the color buttons (that double as Maitryea appliers) are there to load the data into the Omega appliers but nothing happens until you actually click on one of the Omega buttons. So you can click on one color of gloves then on another color of socks, it will work just fine and will apply both at the same time once you click on the layer button to validate.

You can tweak the Glossiness and Environment values afterwards to make your latex shine more or less brightly, and look more or less metallic by clicking on the "Glossy" and "Enviro" sliders respectively (they are not buttons, the higher you click on these areas the higher the values). My scripts also detect the change so they retain the new value for later. In clear, this means that once you change the values, applying another latex color will use these new values and not revert to default. The default values are Glossiness 200 (that's roughly what you get by clicking on the top of the "G" of "Glossy" on that slider) and Environment 0 (which is all the way down to the lower limit of the "Enviro" slider). Omega requires to show the hovertext over the HUD but in the case of these HUDs, it is displayed out of the screen because the root prim is against the top edge. If you wish to see the hovertext (which displays the glossiness and environment values), you can move the HUD down.

There are a couple known issues with Omega that I will discuss below. They are not game-breaking.


If you wear breasts compatible with Lolas

It works the same way as Omega, you wait for the "selected" message(s), then instead of clicking on an Omega button, you click on a Lolas button (the two buttons with the pink "L" on the left).


Bonus

There's also a little bonus : deep black opaque catsuits, bodysuits and socks & gloves. Deep black as in RGB 0 0 0, totally black. It has been a rather popular request as the regular black is a very dark grey, not totally black (so we can see features even when not in the light), and some people wanted their black black.


I didn't feel like completely redoing the HUDs so I simply added buttons touching the "black" appliers. I know it does not look very pretty on the screen but until I find a better idea, that's where the "deep black" colors will be. I also only did that for the opaque latex appliers and not the transparent ones because the difference with the regular black ones wasn't obvious enough.


Oh, and lastly, I've added a copy of the spinning lights contained in the box of the Cloak of the Initiate. That way you can test the shine of your latex with pretty colored lights. But you don't need those because if you're reading this post, you've already bought the latex appliers and hopefully managed to make your body shine without my help, right ? *snicker*


Known issues

* The "Tex" and "Mat" Omega buttons do not do anything, apparently, yet they are named correctly. I don't know why they don't work work, I know they work in my When You're Hot HUDs. It is not really under my control though, they are handled by the Omega scripts. If I find the reason for this bug and manage to fix it, I'll issue an update later.

* Sometimes when you apply to Omega, the legs don't change. It is completely random and apparently only happens on the catsuits and the bodysuits, never on the socks. When it happens, simply click on the same layer button and it will work. Or double-click on the layer button in the first place whether the bug occurs or not. I have no clue what causes this, but clicking the layer button again without clicking the color button first shows that the leg Omega applier already has the correct information in its memory, so I guess this is a timing issue with Omega. I don't have access to its source code and protocol, so I can't exactly debug that.


How to update

To update your latex product(s), simply rez the updater object on the ground near you and wait. The update will be sent to you automatically and the updater will de-rez itself after a few seconds.


Have fun !

Marine


PS : Please do not ask me how I managed to make a multi-HUD with materials working with Omega, because it is normally not doable. It would be tedious to explain and requires quite a lot of scripting. I did this by using a few tricks but nothing shady, I did not have to hack anything or break any ToS.

Thursday, September 7, 2017

New product : When You're Hot


Hi !

Today I am making something a little different, a set of sweat and wet appliers for your mesh body and head, called When You're Hot !

Why that name ? Because when you're too hot and sweaty, what you need is a good shower, or a walk outside under the rain, and this is exactly what this product is all about :p

Please note, these appliers are compatible with Omega-enabled heads and bodies, but NOT with Catwa and Lelutka Evolution ! It might change in the future but that does not depend on me. More details later in this post. When I refer to Lelutka in the rest of this post, I refer to Lelutka Origins (Simone, Cate etc) specifically. Please bear this in mind if you're a Lelutka Evolution user.

These appliers go from a nice subtle and erotic sheen on your skin to being completely drenched in water. With all stages in-between. The stages are, in order of intensity :

- Warm : A subtle sheen on your skin, very erotic.
- Hot : More sheen, a few beads of sweat forming where the skin outputs the most heat.
- Torrid : Even brighter sheen, more beads of sweat, the forehead is clearly shiny and glittery.
- Workout : You're clearly sweaty, like after a good workout, the beads of sweat are bigger, there are more of them and some are starting to run down your body.
- Sauna : You're sweating all the water out of your body !
- Shower : When you're in the shower, or stepping out of it, your body is covered in running water. (*)
- Rain : When you're outside under the rain, the drops are longer, thinner and probably colder ! (*)

(*) : This works very well with the Hikari and Chizuru wet hairstyles from Argrace. The one I'm wearing in the Shower and Rain pictures is Hikari (Chizuru is shorter).


A nice summer afternoon (no shine is applied so you see the difference with the three following images)

Warm and cozy... (here the "Warm" applier is used, you can see the subtle shine)

Ok it's getting hot in here ! (the "Hot" applier is in effect, notice the little beads of sweat that appear on my skin)

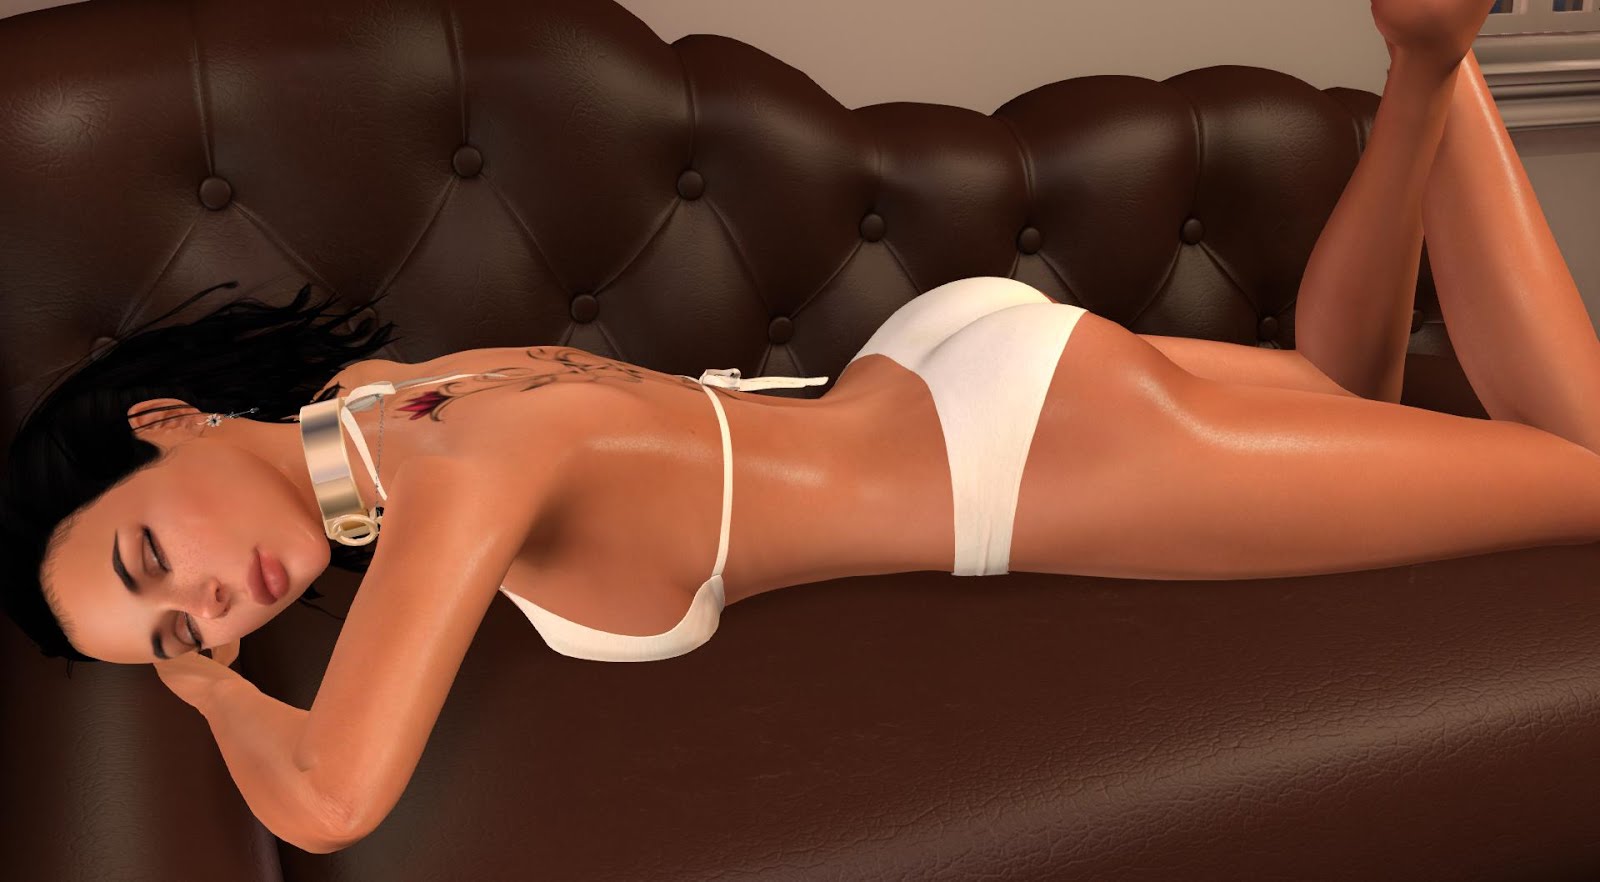
Can't nap in this heat ! (here I am using the "Torrid" applier, which has a bit more sheen and even more beads of sweat)

Let's head to the beach. (I am using the "Warm" applier with maximum Glossiness, plus Shimmer on Maitreya set to the maximum, to demonstrate how you can look oily as well with these appliers)

A little sunscreen again after having been in the water to cool myself of. (using the "Workout" applier here, which has nice big beads and running sweat, very good for when you want your body to look wet but not overly so)

I'm melting here ! (here I'm using the "Sauna" applier)

Zzzzzz... Shoot ! It's time for my workout ! (more "Sauna" here)

At least... it is cooler... inside the house... *huff* *puff* (more "Workout" applier under a different lighting)

This is pure masochism, I'm telling you ! ("Workout" again)

But sooo worth it. (even more "Workout")

After so much hard work, a good shower feels like heaven. (using the "Shower" applier here, note that the blueish spots are not part of the appliers, they are the particles spawned by the shower itself)

So, so good... (more "Shower" action)

Ok let's not spend an hour in here, I have an appointment ! (even more "Shower" to show the running droplets of water on the legs)

I did not stay that long under the shower, no I did not. But the weather has turned to crap ! (using the "Rain" applier now, with long thin drops all over the body)

Why am I waiting outside under the rain in a bikini with an umbrella that I am barely using ? Don't ask me, this is Second Life ! (with "Rain")

At least I can't complain about the heat anymore now. Brrr. (even more "Rain")

That's it, I have waited long enough, he's not coming, time to go back home before I catch a cold. (and yet more "Rain")

I was longing for a little time in the sauna... (using the "Sauna" applier again, under a different lighting than the first time)

 
Nothing like some time in the sauna to relax your body after a hard day of work. What ? Yes it was a hard day of work ! (more "Sauna", notice the long drops on the belly)

Zzzzzz... (and yet more "Sauna", just because)


Dynamic shine

They are meant to shine dynamically and realistically, the light is not baked, meaning they won't work on a system body or a system head, only on mesh bodies and mesh heads, either Maitreya and Lelutka or Omega-compatible mesh bodies and heads like Belleza, eBody, LOGO etc.

Please note that for the time being, Catwa and Lelutka Evolution heads will not work with this product. This is because of two reasons : firstly it is not natively compatible with Omega, meaning it needs a relay, which does not handle materials. Secondly, the only layer on which one can apply materials in Catwa and Lelutka Evolution is the skin. But these materials need to be applied over an invisible texture, otherwise they look ugly (the beads look like pimps and blisters and the long drops look like scars, ugh).

You might argue that those mesh heads can also use Bakes On Mesh, but since Bakes On Mesh does not support materials, I can't make wearables for When You're Hot. I wish I could, this would make things so much easier than having to deal with appliers, but we do with what we have.

In order to check if your mesh head is natively compatible with Omega, check this link. If your head is not in the list, then it won't work with this product.

A few videos to show you the dynamic shine in action :


If you are interested in the treadmill I'm running on, you can find it here.

Attention, you need to have your Advanced Lighting Model activated in order to see the shine, otherwise you won't see anything at all. Other people looking at you ideally need their ALM activated as well or they won't see you sweaty or wet.

To activate ALM, open your Preferences, go to "Graphics" and tick the "Advanced Lighting Model" checkbox, if not already done :


If doing so cripples your FPS (Frames Per Second, the speed at which your viewer renders your view in SL), just deactivate the dynamic shadows like this :


Of course there needs to be local lights around, at the very least some sun. If you are in an area without any local lights and no sun, your skin won't shine, obviously. The folder contains an object called "spinning lights" that you may want to wear to have lights rotating slowly around yourself. It is great for testing if your appliers work and see how they look under different lights.


How to use

In this section I will assume that you are a Maitreya + Lelutka user like me, knowing that if you are wearing any other mesh body or head, you will need to use the Omega applier HUDs instead of the Maitreya + Lelutka applier HUD. More on the Omega appliers later in this post.

This is how the Maitreya + Lelutka HUD looks like :


It is really simple to use. To apply a level of sweat, simply click on the head icon you want, which will immediately apply to your Lelutka mesh head (unless you activated its Rerouting feature, in which case it will ask you what layer you want to apply to), then on a body icon, making your Maitreya mesh body ask you what layer to apply the textures to. And that's it.

Attention : As explained above, Lelutka Evolution is NOT compatible with this product, either using the Lelutka HUD or the Omega one, because it cannot display materials on any other layer than the skin, and When You're Hot cannot apply to the skin.

Please note that applying to the Underwear layer will leave an untextured gap around the neck, because the Underwear layer (and the Clothing one too but you don't really want to apply the sweat to it as it would look weird between the breasts) does not go all the way to the edge of the neck. So unless you are wearing a collar like me, you should better apply to the Tattoo layer when using Maitreya.

Actually this HUD does a third thing, it automatically applies to any Lolas compatible object you are wearing, for example Lolas breasts, or Code-5 cuffed breasts. Depending on that object, you may need to activate that layer to show the shine, but it works. It applies to the Top layer by the way, due to Code-5's bra layer being alpha masked with no way to change that.

Because of its Lolas compatibility, please do NOT wear an Omega relay for your Maitreya mesh body, it would only show the textures on the upper part of your body and you'd think there is a bug. This is because Lolas and Omega share the same channel and have very similar protocols for the top of the body (not for the bottom and head, which use a different channel). So if you are wearing your Maitreya Omega relay, unwear it, it conflicts. Plus it cannot handle materials anyway.


Clicking on the top of the HUD hides it partially, click again to show it again. Clicking on the "M" icon in the top left corner gives you a link to my Marketplace store.


Some mesh bodies offer options that others don't, for example Maitreya lets you adjust the Glossiness of your already applied textures, while Lelutka allows you to adjust the opacity of your tattoo layer (which is what the head appliers apply their textures to by default). By the way, in order to see the shine on your Lelutka head, don't forget to actually activate the Tatoo layer on its HUD because apparently it does not do it automatically :


Speaking of head tattoos, since the head appliers apply diffuse, normal and specular textures, not only do they make your head shine (notice I write "head" and not "face" because there will be wetness on your skull and neck as well), but they also remove whatever tattoo texture you were wearing. This may or may not be what you want, but leaving the tattoo intact would most likely give the shine a dirty black or grey tint, so the tattoo is replaced. I will see if I can find a way to keep the tattoo intact while applying sweat over it, for a future update. The reason for this is technical : if you want a white shine on a partially transparent surface, that surface must be white. Most tattoos are not, so the shine takes whatever color they are and usually the resulting shine is ugly.


Depending on the ambient light, on your own tastes and the situation you're in, you might find your shine too bright or too dim. There are a few tricks to make the shine make it look the way you want, at least on Maitreya. You can for example tweak the "Glossiness" slider on the "Layers" tab, and/or the "Shimmer" slider on the "Skins & Options" tab. I usually set my Glossiness slider to something between 66% and 100%. The Shimmer slider is nice for lower levels of sweat because it mixes with the shine of the applier, but with different reflections. It gives a more natural look in my opinion. Personally I think that turning the Shimmer off (not all the way down, but turned off with the "Shine on/off" button) looks even better because the skin underneath is shaded less, which is more realistic if your skin is wet. But your mileage may vary.


Glossiness slider on the Maitreya HUD

 
Shimmer slider on the Maitreya HUD


You can also combine two body appliers (at least on Maitreya) to increase the shine.

The same goes for the "Shimmer" slider on the Lelutka HUD, but don't forget to press "Restore" first before modifying that slider, in case the Shimmer was off. Apparently the Lelutka HUD does not reactivate it automatically.

 
Shimmer slider on the Lelutka HUD


Omega appliers

If you are using another mesh body than Maitreya, and/or another mesh head than Lelutka, you need to use the Omega HUDs contained in the folder instead of the Maitreya + Lelutka one. Attention, your mesh body/head must be compatible with Omega v2 so it can display materials !

You will quickly notice that there are three appliers instead of one : one for the head, one for the torso and one for the legs. Wear them all three. This is due to Omega not being able to handle more than one part of the body per HUD.

The HUDs look like this :


Yes, there are hovertexts above the HUDs, there is nothing I can do, the Omega ToS requires to have them shown.

To use these appliers, simply click on one of the pictures then on one of the layers in the same HUD. Repeat for the other HUDs. For example, click on the "Workout" head icon on the top HUD, then on "Tattoo" and your mesh head will suddenly look very sweaty ! Provided it is compatible with Omega that is. It is important to understand that unlike the "Maitreya + Lelutka" HUD, clicking on a picture on an Omega HUD does nothing in itself, it just prepares the HUD for the application when you click on the layer buttons ("Tattoo", "Makeup", "Bra", "Top", "Undies" or "Pants").

Once done, you can then click on the "Glossy" and/or "Enviro." buttons to tweak the glossiness and environment values of the applied textures respectively. This is something you cannot do with Maitreya, actually, so in this regard the Omega HUDs are more powerful than the Maitreya one. Please note that these two "buttons" are more like "sliders". The value depends on where you click on those buttons, hence the double arrows drawn over them. The more to the right the click, the higher the value. Tweaking the environment is good if you want to give your body a little oily look, I recommend setting it between 10 and 20 (that's done by clicking somewhere over the arrow to the left). I wish Maitreya had this kind of option.

Clicking on the slashed "Tex" button will remove the texture (which is invisible anyway so that won't change anything) and clicking on "Mat" will remove the materials, suppressing the shine totally.

Clicking on the "M" icon in the top left corner gives you a link to my Marketplace store, clicking on the "Omega" icon in the top right corner gives you a link to the Omega website.


You can find the appliers at my store on the Marketplace, it is No-Modify, Copy and No-Transfer and costs L$700. The box contains an updater to rez in case an update is available for this product, updates are always free. Also if you ever break your product, rezzing the updater will automatically get you a redelivery. Please note that since this product is no-transfer, there is no refund so all sales are final, I can only refund double purchases.

Please note  that these appliers are made for ladies. I know that most male mesh bodies and heads are compatible with Omega, and that's great, but I do not guarantee this product looks good on men. I have a feeling that it will, but I did not test.

And as always... Please try the demo first !


Have fun !

Marine


PS : The umbrella is a full perms one I bought long ago, to which I applied the wet textures I made for the Cloak of the Initiate.

PPS : The accessories (collar, umbrella, bikini, heels etc) are not included.

Wednesday, September 6, 2017

Good news about the latex appliers !

Hi !

While working on my current project, due for release very soon (this week if I'm lucky, but I won't say what it is, neener-neener !), I really wanted to make it compatible with Omega, to let other mesh bodies than just Maitreya use it.

Problem is, it uses materials, there are several appliers, and the Omega materials-enabled HUD cannot support several appliers in one object. In other words, if you want to make a product containing, say, 10 appliers for Maitreya in one HUD, you also have to make 20 more objects for Omega. 10 for the torso and 10 more for the legs. Totally impractical. You may recall that my Latex catsuits, Latex bodysuits and Latex socks & gloves are only compatible with Maitreya for this very reason. Not because I don't like other mesh bodies, but because with more than 30 appliers per product, I thought it would be more entertaining and less mind-numbing to have my nails torn off one by one instead.

I messaged the owner of Omega last year asking when she would improve her materials HUD so we could finally make multi-HUDs with materials, and got no useful answer. Then I messaged again two months ago and the answer was along the lines of "we are sorry, this is too much work so we won't do it". Grmblrmblbl.

Ok it might be too much work for them but I actually did it myself. Hah ! In a way that doesn't require hacking that system or anything like that. Basically the template HUD provided by Omega, that 99% of the clothing creators use, is comprised of two scripts : one proprietary applier script that you can't read, and the other called "config" that is open source and that you can modify. This script contains the UUIDs of your diffuse, normal and textures, as well as the scales, offsets, default glossiness etc. When you save that script, it sends its config to the main script and that's it. It's pretty static.

Then you press on an applier button (marked "Tattoo", "Underpants" or "Pants" for the legs applier, "Tattoo", "Bra" or "Top" for the torso applier and "Tattoo" or "Makeup" for the head applier) and those textures are applied.

What I did was simply ditch the "config" script and make my own, that custom script containing all the textures of all the appliers for this object. The HUD has several buttons (for example several colors and patterns for a catsuit), all you have to do is click on the color button then on the applier button (for example "Tattoo") and voila ! Well, you have to do it a second time for the other part of the body as well thanks to another HUD because each HUD can only apply to one part of the body and not both, but you get my point.

It was actually very easy to do and I'm ashamed I did not do this sooner. I was waiting for Omega to release an update... which never came.

All this to say that now that this roadblock is lifted, I will be able to work on extending my latex stuff to other mesh bodies than Maitreya. Better late than never, right ?

Please note that I did not say that I will necessarily succeed. But I confirmed it works for my current project, so I'm fairly confident for that update. I can also not give an ETA, I really need some time off and I will take some after releasing the project I am now completing. But this is no longer a no-go and this is the good news :)

Have fun !
Marine