Hi,
This was a long-standing update but I kept postponing it because I always had something more urgent to do... Sorry about that. Here is an update to the Proud Girls that will hopefully make your life easier. It's not a big update, just a few quality of life changes.
The changes
Skin materials
Skin appliers can now change the materials of the skin since Maitreya's appliers can do it too. You can restore the materials by clicking on the "Restore mat." button located in the Maintenance menu.
Long applier messages
Some appliers were not fully compatible with the Proud Girls because the latter could not parse their messages. Now when such an applier is used, the Proud Girls will assume it is a Lolas applier with materials (those are the longest).
Keep the mask mode
When applying a texture, the mask mode of the layer you apply to is now preserved instead of being reset.
Keep the shine
That one was the most annoying issue of all. Now when you apply a texture with materials, the shine of the target layer won't change except if it is specified as 0 (or there are no materials) by the applier. Just like in Maitreya.
Don't change the shine of the rings/barbells/chain
Now when you change the tint of the rings, barbells or chain, their shine won't change at all. In fact, the shine won't be changed by the script anymore, so you can set it the way you want, manually, and it will remain that way.
How to update
It's easy. Simply rez the "Updater Proud Girls (rez me)" object near you and wait (don't be in "Do Not Disturb" mode), you should receive the new box shortly.
Or you can get a redelivery from the Marketplace, that works too.
Have fun !
Marine
Thursday, March 21, 2019
Real life pics & video how-to
Hi there,
Following the release of my little gift last Saturday, I would like to explain how I made all those tapes so that you can make your own, and hopefully share or sell them. Because yeah, this little gift wasn't completely out of interest, I want other people to produce content too, not just me :p
This blog post is aimed at anyone who owns either the HD Video System and/or the RemVision and wants to make their own tapes, either with Second Life (SL) pictures and videos, or with real life (RL) ones. Or a mix of both. Or your own drawings. Or whatever you can think of.
I have already written a comprehensive blog post explaining how to take your own videos in SL and how to turn them into animated pictures that the HD Video System and RemVision can play. You can find it here. That post, however, is SL-centric and you may want to upload your own images and videos to display them in SL, and the process is slightly different. The goal of this present blog post is to show you how. I will speak in the first person as if you were looking over my shoulder while I'm working.
I will use a few sample pictures and animated GIFs as an example for this tutorial. Please note that I do not own any of the images I use here, I downloaded them from Tumblr (when it still allowed adult content) and Bdsmlr. They're adult but not pornographic, just a little erotic. I do not include any RL bondage picture either, nothing that could look real and non-consensual (even if bondage pictures are, hopefully, consensual), only sexy latex pictures.
I have uploaded to my dropbox a zip file containing all the files I use in this tutorial. It is in the finished state, so after downloading this zip you will get the original files, the generated textures and the intermediate AVIs. You can find this file here.
The "Making Movies - Free Tools" box located at my shop also contains the finished (but not finalized) tape with all the uploaded textures in it, as well as the finished track notecard so you can compare and use it as an example.
Are you ready ?
Good. Let's go.
The process of turning real life content into SL tapes is pretty straightforward and does not require much creativity. It is divided in four phases.
1. Organize your content.
2. Process it.
3. Upload it and make the track.
4. Create the tape label
But first, you need to make sure your tools are ready.
Phase 0 : Prepare your tools
(But you need to do this only once.)
Well, guess what, I won't actually explain how to install your tools here, since I've already done so in this post. Just to recap, you need Python 2 or 3, VirtualDub and ImageMagick (and ShnTool if you need to process music, but that's beyond the scope of this present blog post). And once all this is installed, you need to download the few Python scripts I've written that will handle the processing for you.
So if you haven't already done so, jump to the Making Movies - Video blog post to find out how to install your tools. I'll be waiting.
Done ? Good. Let's proceed.
Phase 1 : Organize your content
Organize your files properly
It may sound like a no-brainer, but since there is probably a lot of content to work through, it is a good idea to organize it all upfront in order to not get lost, waste time, or upload the same thing several times, wasting money doing so.
First of all, I create a folder on my hard drive that I will name, say, "Example". Just for convenience, I also copy the three Python scripts I will need to process the files, because I don't want to have to type long paths in the command prompt.

In this folder, since I'm going to process still pictures and GIF files, I need to create (at least) two folders that I will name "images" and "videos", and I create a text file at the same time, that I name "Track_example.txt". This text file will contain the timings of all the pictures the tape will display. It will remain empty for now until the last phase.

Now is the time to select the content I want to include in my tape. For this part, anything goes. It may be pictures found on the internet like here, or pictures taken in SL, or drawings, the limit is your imagination.
Here I simply show the thumbnails of all the pictures I will process :

Sexy latex pictures !
In fact, the top four in the window above are animated GIFs, the second one being really big (20 MB !). The other ones are simply JPG pictures but some are bigger than 1024x1024, which is the maximum SL can display on a prim.
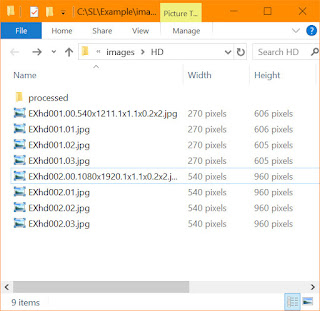
You can already see here that you have three types of files. Normal pictures, big pictures and animated pictures. Let's organize them so we don't mix them up. I create one folder inside "images" that I will name, for example, "HD", and move all the bigger pictures in it :

The first one is 540x1211 and the second one is 1080x1920.
There are a couple other pictures which have one dimension a bit bigger than 1024, but they're no bigger than 1050, so we would not really gain much precision by spanning them over more than one prim.
You need to keep in mind that the more prims you use for a single image, the more money you have to spend when you upload it (since it takes more than one texture to display at full resolution), but also the fewer pictures you can display in a single tape because the Track scripts in the tape have limited memory, so you will have to create more than one tape. It's not a problem, but it is something to keep in mind if you want to avoid a script crash at some point. From my experience, I know that a tape can manage up to 300 textures.
As for the videos, it's easy, I move all the four GIFs to the "videos" folder :

Rename your files (if needed)
All my files are organized the way I want, but their names are a bit... unwieldy. They're "tumblr" or "bdsmlr" followed by a bunch of letters and digits, and at some point I will have to copy their names into the "Track_example" text file. The names are so complex and random that this is a recipe for error. It's not a problem memory-wise because the Track scripts do not retain the names of the pictures at all, but SL does have a limit of 64 characters for the name of an item in your inventory, and some files will have a lot of parameters added to their names later. So, better keep things short.
I don't know how you'll do it, but I use FreeCommander (I didn't use it to take the snapshots of the folders above to avoid confusing you, but I actually seldom use the Windows Explorer anymore, instead it's FreeCommander all the way and it's pretty much the very first app I install when I get a new computer) that has a nifty multi-rename feature. Here I use it to rename all the files "EX" followed by either "v", "sd" or "hd" for "video", "standard definition" and "high definition" respectively, then a three digit number, then the original extension. In the end, it gives me this :

There. This will be much easier to manage.
All this renaming is entirely optional and you rename the way you like, if you want to rename at all. This was just to show you an example of how to make things easier for you later.
Process your files
Now we're getting into the thick of it. This section will take the biggest part of this blog post, so brace yourself.
Process the SD pictures
We'll begin with the easiest, the processing of the simple pictures (the ones I have renamed with "sd"). This means, in this particular case, to rename them in a way that the name of each file will contain the dimensions of the picture in a format that the HD Video System and RemVision will understand. It can be done by hand, but the "RenameWithDim.py" script can do it for you.
To do this, I open a command prompt where the SD pictures are, i.e. in Examples/images :

Just for the sake of the example, typing "dir" in this directory gives me the list of all the SD pictures I have and none other :

Time to rename them. I type :
python \SL\RenameWithDim.py
And it gives me this :

What this script just did was add the dimensions of each file to its own name in the form ".WxH" before the extension. That's all. It's a bit slow because to do this it has to open the file, identify it with "identify" (a process in the ImageMagick suite), write the output in a temporary file, read the output from that temporary file, then close it. For each picture. Still, it's a lot easier than to do this by hand.
Look at the file names now :

That's it, the SD pictures are ready, there is no more work needed to do on them.
Please note that if you modify the dimensions of one of the pictures (for example you crop it) and need the dimensions recalculated, you can re-run the script and it will replace with the new dimensions instead of appending the new ones to the already existing file names.
Likewise, if you need to remove the dimensions totally to go back to the original names, simply write "remove" after the command. That would be :
python \SL\RenameWithDim.py remove
Process the HD pictures
Now let's go to the HD folder and process the two big pictures that are in it.

The first one is 540x1211 and the second one is 1080x1920 pixels. I would like to point out that at the time of this writing, the script can only generate a square number of pictures to compose the HD ones here, so we'll generate 2x2 pictures for the first one and 2x2 pictures for the second one. I think it's a waste of resources and I would like to work on the script and on the screen of the HD Video System to handle 2x1 and 1x2 formats, but this is not a trivial change so for now this is what we have.
Unlike the SD pictures, here I need to do them one by one. Later I will modify the script to run batches.
I make the command prompt go to this directory by typing
cd HD
I check by typing
dir

Everything is there, let's go.
Let's do the first one. This time the script to use is "HdTextureToSdTextures.py" (yes, it's a long name but at least it's clear). I simply type
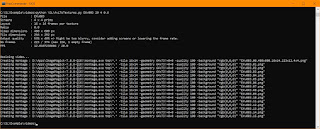
python \SL\HdTextureToSdTextures.py EXhd001.jpg
And I get :

Notice that now I no longer have two files in this HD folder but six, as the script has created four pictures of less than 1024x1024 to cover the whole original EXhd001.jpg file which it hasn't touched at all.
I do the same for the second file and I get :

Now there are ten files in my folder, but only eight will have to be uploaded. Now is a good idea to move the original two to a safe place so I won't upload them by mistake later. I simply create a folder that I name "processed" and I move those two files (EXhd001 and EXhd002) in it.

Now only the eight generated files remain.
Notice the name of those files. There are two groups of four but only one per group has the actual parameters containing, among other things, the dimensions of the original picture and the layout to use (for example 540x1211 and 2x2 respectively). It doesn't matter that the name does not include the actual dimensions of the file (for example 270x606) because the screen does not really care about the dimensions. What it cares about is the ratio between the width and the height in order to display the picture without stretching.
The other parameters are specific for animated pictures and are irrelevant here.
That's it, we're done with the HD pictures, let's move on to the animated ones now, which require the most work.
Process the GIFs
When you process an animated GIF, the goal is to have it display at the same dimensions, the same frame rate and hopefully little to no loss in resolution. The last part is what causes issues because as you know, SL can only display 1024x1024 textures, and you want to squeeze all the frames of your GIF into one or more of those textures.
In practice, you will most likely lose some resolution but it won't matter. As long as the quality is 60% of the original resolution or more, you'll be fine.
Instead of blathering for hours on the subject, let's try one of the GIFs. First, I go to the "videos" folder with the command prompt :
cd ..\..\videos
dir

The four GIF files are there, good. Let's try and process the smallest one, which is EXv004.gif. That's the spanking one, it is 10 frames long and its dimensions are 500x273.

Wait... How do I know how many frames it takes ? Well... FreeCommander told me. I don't know how to get this information in the Windows Explorer, but it's not really important anyway :p
Crop and convert to AVI
The first step is to open this GIF in VirtualDub and to crop it, because there might be areas that you don't really care about and can do without. The less area to render, the more frames you can cram into the same texture, so the less resolution you lose. Here is how it looks in VirtualDub, which indicates 11 frames (from 0 to 10) but the last one is empty anyway, so that's 10 frames in total, FreeCommander wasn't lying.

Let's crop it (no pun intended, but yeah, we're cropping a spanking).
To do this, I open the Video > Filters window (Ctrl-F is the shortcut) and add a "null transform" filter to crop the image.

I click on "Cropping..." and this opens the "Cropping" window which will allow me what parts of the video to show and what part to hide.

The original video is 500x273 big and the null transform filter is new so there is no cropping set yet. What you want is show only the interesting parts and make sure the dimensions are even. It won't work if one dimension is odd (like here, 273 is an odd number, if I saved the video now VirtualDub wouldn't let me). This is because I use the Xvid codec which can only handle even dimensions.
A good way to ensure that the dimensions are even is by dragging the sides with the Shift key pressed. Much faster than to adjust precisely, to the pixel, until you get an even dimension.
Here in this video, I don't really care about what's on the left of the girl's butt, so the doorway can be hidden. I do want the spanking hand to show though, and since it moves, it is a good idea to find out how far to the left it goes. It turns out that frame 7 is where it is leftmost, so I can crop with this frame active.
As for the vertical dimensions, I don't really want to crop but I have to because the Height of the video is an odd number, so let's lower it by one by increasing Y1.
Here is the result after some cropping :

I simply shift-dragged the left side and clicked on the down arrow next to Y1. This took like 3 seconds in total. I click OK twice and the main window of VirtualDub shows me what the video will look like after the cropping. But I don't really care, I want to get on with it as fast as I can, because this is not the only video I have to process. For this example there are only four videos, but there may be a lot more than that in your case (there are a lot more than four videos in the three gift tapes I made).
So all I do is press F7 (that's the shortcut for "Save as AVI"), I select the same folder in the Save dialog if not already done, and I click "Save" or press Enter without renaming anything.

So that's one done. The result is a file named EXv004.avi in the same folder. If I open it in VLC, it shows the same animation minus its left part, with the same frame rate and no loss. The loss will occur when I turn this AVI file into textures, which I'm going to do in a minute.

After making several videos out of GIF files, it will be really quick.
- Drag and drop in VirtualDub
- Press Ctrl-F
- Crop
- Press OK twice
- Press F7
- Press Enter
- Done. Switch to the next.
Here is the result with one AVI per GIF :

Notice that in this Explorer window, I added the Frame width, Frame height, Frame rate, Width and Height columns in the Details view mode. This allows you to see the differences between the Frame width and height of an AVI, and the width and height respectively of the corresponding GIF and see how much I cropped each file (and that I didn't crop file 2 and 3 at all).
Now that all the AVI files are ready, it is time to process them into textures that the HD Video System will use to display those videos in SL.
Turn the AVIs into textures
To do this, you need the "AviToTextures.py" script and a few parameters :
- The name of the file (with or without the ".avi" part, surround the name with quotes if there's a space in it)
- The frame rate (you see it in the Windows explorer)
- The number of prims from 1 to 5 (to make 1x1 to 5x5 textures respectively)
- The target number of frames (that parameter is optional, use it if you want to decimate)
Let's try the first one with the most naive parameters. I type in the command prompt :
python \SL\AviToTextures.py EXv001 11 1
This means "process video EXv001.avi, which goes at 11 FPS and I want it to use 1x1 textures". And I get this :

The script recapitulates the parameters and indicates the calculations it does, such as the dimensions of each frame in the final texture (here 204x204), the layout it chose (here 5x5) and more importantly, the quality. That one is simply the final dimensions divided by the original dimensions. It will write "OK" if the quality is between 60% and 120%. Less than 60% and you might want to use more textures or to decimate the frame rate (i.e. remove some frames), more than 120% and you are wasting space. Here, apparently the naive parameters are OK for the script and the result seems not bad at all :

The result is a file named EXv001.00.240x224.5x5.25x11.1x1.png. Its parameters contain all the screen needs to know to display this texture as an animated picture with the right frame rate and the right dimensions, there is nothing else you need to do.
The original GIF contains 25 frames that are mostly square (240x224) so it ended up with a 5x5 layout. And you can squeeze 25 of these small images into a 1024x1024 texture just right, without much quality loss, which is why the end result is satisfactory. It won't be so easy for some other videos though.
So let's consider the first video done and switch to another, more problematic one, like the third one which is 480x600 and spans over 374 frames ! You can't cram 374 images of those dimensions into a 1024x1024 texture, no matter how hard you try, but let's try anyway.
python \SL\AviToTextures.py EXv003 20 1

Yyyyeah... 10% quality, that's not nearly enough. Indeed, this is what I get with these parameters :

Here are the 374 frames put inside a single 1024x1024 texture. I don't know what I expected, but it can't get better than this with such tight resources.
The original video goes at 20 frames per second, which is pretty smooth, and the image is that of a cute girl spinning in her gorgeous black latex dress. I want to see the latex, but I'm not interested in so much smoothness, I would be perfectly happy with 12 to 15 FPS at most. The fewer FPS, the more resolution we can use, and vice-versa since in the end, all the frames are put inside the final texture(s).
With 10% quality, I don't really have a choice anyway, I have to use 4x4 textures or even 5x5. Let's try with 4x4 and lower the frame rate down to 60% of 20, which makes 12 FPS :
python \SL\AviToTextures.py EXv003 20 4 0.6
That's not bad at all... Ok, the quality is a little low, but around 50% is still good. The original GIF is very big and detailed anyway, and I might not need so much detail. Actually, looking at the generated tmp.avi file, which is 12 FPS, I'm pretty satisfied with the result. Of course, the smoothness is nowhere near as good as the original GIF, and the dimensions are halved, but it's still pretty good.
Here, let me show you two of the 16 generated textures :


That's textures "01" and "09" respectively. You can see the detail of her face and hair on the first, and the details of her latex dress on the second. You can even count her fingers. Such detail is all I ask.
So let's consider it done.
No need to dwell on the remaining two, but let me show you the commands I used to generate their respective textures :
python \SL\AviToTextures.py EXv002 7 2
python \SL\AviToTextures.py EXv004 7 1
This gives me 4 textures (2x2 prims) for EXv002 and 1 texture (1x1 prim) for EXv004. Both videos have around 7 FPS and I didn't need to decimate. The output quality is around 90% in both files, which is excellent.
That's it, the pictures and videos are all done ! It wasn't so hard, was it ? We have converted each GIF to an AVI, cropped each AVI then converted it into PNG files, sometimes one AVI yielding several PNGs to keep relatively close to the input resolution and frame rate. All that needs to be done now is to manage all that new content, into SL.
But in order to avoid uploading stuff that we don't want to upload, let's organize things a little.
I create a folder that I name "processed" in the "videos" folder, and I move all the GIFs and AVIs files in it. I also don't need the "tmp" folder anymore nor the "tmp.avi" file so I delete those.

Write the track and upload
Write the track
The track is the "Track_example.txt" file that was created at the beginning, and that remained empty for the whole duration of the tutorial. Now is the time to fill it.
Its purpose is to specify the order and timing of each picture and video, and what the sections are. You will see what I mean by that shortly.
I won't explain the details of what an entry is, everything is already explained in this blog post. But that post does not explain sections so I will do so here.
First, open the "Track_example.txt" file in a text editor like Notepad, Notepad++ or Scite (I use the latter).
The track will need to specify, for each picture and video, how much time it must stay on screen, so that's what we're going to do now.
We have 8 SD pictures, 2 HD pictures and 4 videos, so that's 14 entries in total. If you forget one, it won't be played by the HD Video System or RemVision at all even if you have uploaded it and put it in the tape. However, there are more than 14 textures in the folder, since some videos yielded more than one texture, and the HD pictures both generated 4 textures each. But you won't reference any original file more than once.
Let's not be too creative there... Let's decide we want each picture to show for 60 seconds and then the next one replaces it, then the next etc. Here is how the track file looks :

Notice that I never wrote any of the parameters contained in the names themselves, only the names and nothing else. The tape track scripts will figure out how to grab the parameters from the textures that I will upload later so no need to repeat them here.
The very first entry is there to avoid confusing RemVision which adds a dummy "Begin" section at the beginning, and I've had trouble in the past when I didn't write this "+1 :: $" line.
Each other entry is a timing (+0/+60) and a file name following a dollar sign because it is a picture or a video. As you can see, they are all written in order. There's no creativity here, I should actually write a script to do it automatically one day. I made one in LSL that I included in the HD Video System but I need to make one in Python. But I digress.
Now suppose we want to group some entries, and to let a RemVision play all these pictures in a random order (the HD Video System cannot play in a random order, only sequentially). To do this we need to define sections, because RemVision can play sections in a random order but all the entries inside the same section will be played in the order they are written. This is on purpose.
Since the section names are copied into the RemVision plugin, it is better to choose short names otherwise a memory shortage may ensue and crash the script. But I'm talking a hundred sections, which is far from the few sections we will write here.
A section is a subtitle that begins with a "!", therefore an entry that begins with "!!" since subtitles already begin with "!". The HD Video System and RemVision do not display those subtitles, and the RemVision plugin stores them so the user can define manual playlists, but other than that they are simply subtitles, and as such follow the same syntax and are stored in the subtitles track script.
Let's see... I'd like to group EXsd007, EXsd008 and EXv001 together because it's the same model (Susan Wayland, even though for the video I'm not 100% sure but whatever), EXsd003, EXsd004 and EXhd001 together because it's full body latex, and the rest will be one entry per section.
It now looks like this :

Save the track
Now that the track is done, copy and paste it into the "*Track audio video subtitle" notecard contained inside the tape, then save.
Upload the files
Ok so now comes the painful part. Painful for your wallet, that is. You will need to upload every single one of those textures, PNGs and JPGs alike. In my folder, that means 38 files exactly (16 JPGs and 22 PNGs). That means L$380 to pay to create that tape, plus maybe L$10 to make the tape label (unless you want to use one of the uploaded textures for that).
But please don't upload the files contained in the zip you downloaded, I have already uploaded them for you. They are inside the "Example RL pics (work)" tape contained in the "Making Movies - Free Tools" box.
Place the files in the tape
Nothing to say except edit the tape and put all the textures in it. Please note that you should not put too many textures in one sweep, try to insert 30 or 40 items, wait a few seconds, do the same with the next 40, wait etc. This will avoid the "inventory creation failed" error from the sim (and you'd notice the failure once you record the tape). Of course, for this example here, there are only 38 textures to insert so this won't be a problem.
Record
Click on the tape and select "Record All". If all goes well, the scripts will read your track notecard and hopefully no texture will be missing (otherwise, see above and you'll need to insert the missing textures again). Once done, the tape is ready to play !
Enjoy !
Now is the time to watch your video and see if there is any issue. If you find an issue, probably all you'll have to do is modify the track notecard and record again.
Optional : Create the tape label
By default the tape label is plain white, but you may want to make your own. No need for a tutorial here, if you can use Gimp or Photoshop, feel free to make your label, if not, you can use any one of the texture that you've uploaded, and offset and scale it so it looks good enough for you.
Finalize
Once you're happy with your movie, take a copy of the tape in your inventory. Then click on the tape in-world and press "Finalize", then "YES". All the content except the notecard and scripts will be removed and you will be ready to share or sell your tape. Don't forget to change the permissions !
That's it, I hope you will find this tutorial easy, and that you will enjoy producing your own content !
Marine
Following the release of my little gift last Saturday, I would like to explain how I made all those tapes so that you can make your own, and hopefully share or sell them. Because yeah, this little gift wasn't completely out of interest, I want other people to produce content too, not just me :p
This blog post is aimed at anyone who owns either the HD Video System and/or the RemVision and wants to make their own tapes, either with Second Life (SL) pictures and videos, or with real life (RL) ones. Or a mix of both. Or your own drawings. Or whatever you can think of.
I have already written a comprehensive blog post explaining how to take your own videos in SL and how to turn them into animated pictures that the HD Video System and RemVision can play. You can find it here. That post, however, is SL-centric and you may want to upload your own images and videos to display them in SL, and the process is slightly different. The goal of this present blog post is to show you how. I will speak in the first person as if you were looking over my shoulder while I'm working.
I will use a few sample pictures and animated GIFs as an example for this tutorial. Please note that I do not own any of the images I use here, I downloaded them from Tumblr (when it still allowed adult content) and Bdsmlr. They're adult but not pornographic, just a little erotic. I do not include any RL bondage picture either, nothing that could look real and non-consensual (even if bondage pictures are, hopefully, consensual), only sexy latex pictures.
I have uploaded to my dropbox a zip file containing all the files I use in this tutorial. It is in the finished state, so after downloading this zip you will get the original files, the generated textures and the intermediate AVIs. You can find this file here.
The "Making Movies - Free Tools" box located at my shop also contains the finished (but not finalized) tape with all the uploaded textures in it, as well as the finished track notecard so you can compare and use it as an example.
Are you ready ?
Good. Let's go.
The process of turning real life content into SL tapes is pretty straightforward and does not require much creativity. It is divided in four phases.
1. Organize your content.
2. Process it.
3. Upload it and make the track.
4. Create the tape label
But first, you need to make sure your tools are ready.
Phase 0 : Prepare your tools
(But you need to do this only once.)
Well, guess what, I won't actually explain how to install your tools here, since I've already done so in this post. Just to recap, you need Python 2 or 3, VirtualDub and ImageMagick (and ShnTool if you need to process music, but that's beyond the scope of this present blog post). And once all this is installed, you need to download the few Python scripts I've written that will handle the processing for you.
So if you haven't already done so, jump to the Making Movies - Video blog post to find out how to install your tools. I'll be waiting.
Done ? Good. Let's proceed.
Phase 1 : Organize your content
Organize your files properly
It may sound like a no-brainer, but since there is probably a lot of content to work through, it is a good idea to organize it all upfront in order to not get lost, waste time, or upload the same thing several times, wasting money doing so.
First of all, I create a folder on my hard drive that I will name, say, "Example". Just for convenience, I also copy the three Python scripts I will need to process the files, because I don't want to have to type long paths in the command prompt.


Now is the time to select the content I want to include in my tape. For this part, anything goes. It may be pictures found on the internet like here, or pictures taken in SL, or drawings, the limit is your imagination.
Here I simply show the thumbnails of all the pictures I will process :

Sexy latex pictures !
In fact, the top four in the window above are animated GIFs, the second one being really big (20 MB !). The other ones are simply JPG pictures but some are bigger than 1024x1024, which is the maximum SL can display on a prim.
You can already see here that you have three types of files. Normal pictures, big pictures and animated pictures. Let's organize them so we don't mix them up. I create one folder inside "images" that I will name, for example, "HD", and move all the bigger pictures in it :

The first one is 540x1211 and the second one is 1080x1920.
There are a couple other pictures which have one dimension a bit bigger than 1024, but they're no bigger than 1050, so we would not really gain much precision by spanning them over more than one prim.
You need to keep in mind that the more prims you use for a single image, the more money you have to spend when you upload it (since it takes more than one texture to display at full resolution), but also the fewer pictures you can display in a single tape because the Track scripts in the tape have limited memory, so you will have to create more than one tape. It's not a problem, but it is something to keep in mind if you want to avoid a script crash at some point. From my experience, I know that a tape can manage up to 300 textures.
As for the videos, it's easy, I move all the four GIFs to the "videos" folder :

Rename your files (if needed)
All my files are organized the way I want, but their names are a bit... unwieldy. They're "tumblr" or "bdsmlr" followed by a bunch of letters and digits, and at some point I will have to copy their names into the "Track_example" text file. The names are so complex and random that this is a recipe for error. It's not a problem memory-wise because the Track scripts do not retain the names of the pictures at all, but SL does have a limit of 64 characters for the name of an item in your inventory, and some files will have a lot of parameters added to their names later. So, better keep things short.
I don't know how you'll do it, but I use FreeCommander (I didn't use it to take the snapshots of the folders above to avoid confusing you, but I actually seldom use the Windows Explorer anymore, instead it's FreeCommander all the way and it's pretty much the very first app I install when I get a new computer) that has a nifty multi-rename feature. Here I use it to rename all the files "EX" followed by either "v", "sd" or "hd" for "video", "standard definition" and "high definition" respectively, then a three digit number, then the original extension. In the end, it gives me this :

There. This will be much easier to manage.
All this renaming is entirely optional and you rename the way you like, if you want to rename at all. This was just to show you an example of how to make things easier for you later.
Process your files
Now we're getting into the thick of it. This section will take the biggest part of this blog post, so brace yourself.
Process the SD pictures
We'll begin with the easiest, the processing of the simple pictures (the ones I have renamed with "sd"). This means, in this particular case, to rename them in a way that the name of each file will contain the dimensions of the picture in a format that the HD Video System and RemVision will understand. It can be done by hand, but the "RenameWithDim.py" script can do it for you.
To do this, I open a command prompt where the SD pictures are, i.e. in Examples/images :

Just for the sake of the example, typing "dir" in this directory gives me the list of all the SD pictures I have and none other :

Time to rename them. I type :
python \SL\RenameWithDim.py
And it gives me this :

What this script just did was add the dimensions of each file to its own name in the form ".WxH" before the extension. That's all. It's a bit slow because to do this it has to open the file, identify it with "identify" (a process in the ImageMagick suite), write the output in a temporary file, read the output from that temporary file, then close it. For each picture. Still, it's a lot easier than to do this by hand.
Look at the file names now :

That's it, the SD pictures are ready, there is no more work needed to do on them.
Please note that if you modify the dimensions of one of the pictures (for example you crop it) and need the dimensions recalculated, you can re-run the script and it will replace with the new dimensions instead of appending the new ones to the already existing file names.
Likewise, if you need to remove the dimensions totally to go back to the original names, simply write "remove" after the command. That would be :
python \SL\RenameWithDim.py remove
Process the HD pictures
Now let's go to the HD folder and process the two big pictures that are in it.

The first one is 540x1211 and the second one is 1080x1920 pixels. I would like to point out that at the time of this writing, the script can only generate a square number of pictures to compose the HD ones here, so we'll generate 2x2 pictures for the first one and 2x2 pictures for the second one. I think it's a waste of resources and I would like to work on the script and on the screen of the HD Video System to handle 2x1 and 1x2 formats, but this is not a trivial change so for now this is what we have.
Unlike the SD pictures, here I need to do them one by one. Later I will modify the script to run batches.
I make the command prompt go to this directory by typing
cd HD
I check by typing
dir

Everything is there, let's go.
Let's do the first one. This time the script to use is "HdTextureToSdTextures.py" (yes, it's a long name but at least it's clear). I simply type
python \SL\HdTextureToSdTextures.py EXhd001.jpg
And I get :

Notice that now I no longer have two files in this HD folder but six, as the script has created four pictures of less than 1024x1024 to cover the whole original EXhd001.jpg file which it hasn't touched at all.
I do the same for the second file and I get :

Now there are ten files in my folder, but only eight will have to be uploaded. Now is a good idea to move the original two to a safe place so I won't upload them by mistake later. I simply create a folder that I name "processed" and I move those two files (EXhd001 and EXhd002) in it.

To take this snapshot I had to press Alt-PrintScreen and at the same time drag and drop with the mouse button down. Since the keys are too far apart and I don't have three hands, I had to press PrintScreen... with my nose. The things I do for you !
Now only the eight generated files remain.

Notice the name of those files. There are two groups of four but only one per group has the actual parameters containing, among other things, the dimensions of the original picture and the layout to use (for example 540x1211 and 2x2 respectively). It doesn't matter that the name does not include the actual dimensions of the file (for example 270x606) because the screen does not really care about the dimensions. What it cares about is the ratio between the width and the height in order to display the picture without stretching.
The other parameters are specific for animated pictures and are irrelevant here.
That's it, we're done with the HD pictures, let's move on to the animated ones now, which require the most work.
Process the GIFs
When you process an animated GIF, the goal is to have it display at the same dimensions, the same frame rate and hopefully little to no loss in resolution. The last part is what causes issues because as you know, SL can only display 1024x1024 textures, and you want to squeeze all the frames of your GIF into one or more of those textures.
In practice, you will most likely lose some resolution but it won't matter. As long as the quality is 60% of the original resolution or more, you'll be fine.
Instead of blathering for hours on the subject, let's try one of the GIFs. First, I go to the "videos" folder with the command prompt :
cd ..\..\videos
dir

The four GIF files are there, good. Let's try and process the smallest one, which is EXv004.gif. That's the spanking one, it is 10 frames long and its dimensions are 500x273.

Wait... How do I know how many frames it takes ? Well... FreeCommander told me. I don't know how to get this information in the Windows Explorer, but it's not really important anyway :p
Crop and convert to AVI
The first step is to open this GIF in VirtualDub and to crop it, because there might be areas that you don't really care about and can do without. The less area to render, the more frames you can cram into the same texture, so the less resolution you lose. Here is how it looks in VirtualDub, which indicates 11 frames (from 0 to 10) but the last one is empty anyway, so that's 10 frames in total, FreeCommander wasn't lying.

Let's crop it (no pun intended, but yeah, we're cropping a spanking).
To do this, I open the Video > Filters window (Ctrl-F is the shortcut) and add a "null transform" filter to crop the image.

I click on "Cropping..." and this opens the "Cropping" window which will allow me what parts of the video to show and what part to hide.

The original video is 500x273 big and the null transform filter is new so there is no cropping set yet. What you want is show only the interesting parts and make sure the dimensions are even. It won't work if one dimension is odd (like here, 273 is an odd number, if I saved the video now VirtualDub wouldn't let me). This is because I use the Xvid codec which can only handle even dimensions.
A good way to ensure that the dimensions are even is by dragging the sides with the Shift key pressed. Much faster than to adjust precisely, to the pixel, until you get an even dimension.
Here in this video, I don't really care about what's on the left of the girl's butt, so the doorway can be hidden. I do want the spanking hand to show though, and since it moves, it is a good idea to find out how far to the left it goes. It turns out that frame 7 is where it is leftmost, so I can crop with this frame active.
As for the vertical dimensions, I don't really want to crop but I have to because the Height of the video is an odd number, so let's lower it by one by increasing Y1.
Here is the result after some cropping :

I simply shift-dragged the left side and clicked on the down arrow next to Y1. This took like 3 seconds in total. I click OK twice and the main window of VirtualDub shows me what the video will look like after the cropping. But I don't really care, I want to get on with it as fast as I can, because this is not the only video I have to process. For this example there are only four videos, but there may be a lot more than that in your case (there are a lot more than four videos in the three gift tapes I made).
So all I do is press F7 (that's the shortcut for "Save as AVI"), I select the same folder in the Save dialog if not already done, and I click "Save" or press Enter without renaming anything.

So that's one done. The result is a file named EXv004.avi in the same folder. If I open it in VLC, it shows the same animation minus its left part, with the same frame rate and no loss. The loss will occur when I turn this AVI file into textures, which I'm going to do in a minute.

After making several videos out of GIF files, it will be really quick.
- Drag and drop in VirtualDub
- Press Ctrl-F
- Crop
- Press OK twice
- Press F7
- Press Enter
- Done. Switch to the next.
Here is the result with one AVI per GIF :

Notice that in this Explorer window, I added the Frame width, Frame height, Frame rate, Width and Height columns in the Details view mode. This allows you to see the differences between the Frame width and height of an AVI, and the width and height respectively of the corresponding GIF and see how much I cropped each file (and that I didn't crop file 2 and 3 at all).
Now that all the AVI files are ready, it is time to process them into textures that the HD Video System will use to display those videos in SL.
Turn the AVIs into textures
To do this, you need the "AviToTextures.py" script and a few parameters :
- The name of the file (with or without the ".avi" part, surround the name with quotes if there's a space in it)
- The frame rate (you see it in the Windows explorer)
- The number of prims from 1 to 5 (to make 1x1 to 5x5 textures respectively)
- The target number of frames (that parameter is optional, use it if you want to decimate)
Let's try the first one with the most naive parameters. I type in the command prompt :
python \SL\AviToTextures.py EXv001 11 1
This means "process video EXv001.avi, which goes at 11 FPS and I want it to use 1x1 textures". And I get this :

The script recapitulates the parameters and indicates the calculations it does, such as the dimensions of each frame in the final texture (here 204x204), the layout it chose (here 5x5) and more importantly, the quality. That one is simply the final dimensions divided by the original dimensions. It will write "OK" if the quality is between 60% and 120%. Less than 60% and you might want to use more textures or to decimate the frame rate (i.e. remove some frames), more than 120% and you are wasting space. Here, apparently the naive parameters are OK for the script and the result seems not bad at all :
The result is a file named EXv001.00.240x224.5x5.25x11.1x1.png. Its parameters contain all the screen needs to know to display this texture as an animated picture with the right frame rate and the right dimensions, there is nothing else you need to do.
The original GIF contains 25 frames that are mostly square (240x224) so it ended up with a 5x5 layout. And you can squeeze 25 of these small images into a 1024x1024 texture just right, without much quality loss, which is why the end result is satisfactory. It won't be so easy for some other videos though.
So let's consider the first video done and switch to another, more problematic one, like the third one which is 480x600 and spans over 374 frames ! You can't cram 374 images of those dimensions into a 1024x1024 texture, no matter how hard you try, but let's try anyway.
python \SL\AviToTextures.py EXv003 20 1

Yyyyeah... 10% quality, that's not nearly enough. Indeed, this is what I get with these parameters :
Here are the 374 frames put inside a single 1024x1024 texture. I don't know what I expected, but it can't get better than this with such tight resources.
The original video goes at 20 frames per second, which is pretty smooth, and the image is that of a cute girl spinning in her gorgeous black latex dress. I want to see the latex, but I'm not interested in so much smoothness, I would be perfectly happy with 12 to 15 FPS at most. The fewer FPS, the more resolution we can use, and vice-versa since in the end, all the frames are put inside the final texture(s).
With 10% quality, I don't really have a choice anyway, I have to use 4x4 textures or even 5x5. Let's try with 4x4 and lower the frame rate down to 60% of 20, which makes 12 FPS :
python \SL\AviToTextures.py EXv003 20 4 0.6

That's not bad at all... Ok, the quality is a little low, but around 50% is still good. The original GIF is very big and detailed anyway, and I might not need so much detail. Actually, looking at the generated tmp.avi file, which is 12 FPS, I'm pretty satisfied with the result. Of course, the smoothness is nowhere near as good as the original GIF, and the dimensions are halved, but it's still pretty good.
Here, let me show you two of the 16 generated textures :


That's textures "01" and "09" respectively. You can see the detail of her face and hair on the first, and the details of her latex dress on the second. You can even count her fingers. Such detail is all I ask.
So let's consider it done.
No need to dwell on the remaining two, but let me show you the commands I used to generate their respective textures :
python \SL\AviToTextures.py EXv002 7 2
python \SL\AviToTextures.py EXv004 7 1
This gives me 4 textures (2x2 prims) for EXv002 and 1 texture (1x1 prim) for EXv004. Both videos have around 7 FPS and I didn't need to decimate. The output quality is around 90% in both files, which is excellent.
That's it, the pictures and videos are all done ! It wasn't so hard, was it ? We have converted each GIF to an AVI, cropped each AVI then converted it into PNG files, sometimes one AVI yielding several PNGs to keep relatively close to the input resolution and frame rate. All that needs to be done now is to manage all that new content, into SL.
But in order to avoid uploading stuff that we don't want to upload, let's organize things a little.
I create a folder that I name "processed" in the "videos" folder, and I move all the GIFs and AVIs files in it. I also don't need the "tmp" folder anymore nor the "tmp.avi" file so I delete those.

Write the track and upload
Write the track
The track is the "Track_example.txt" file that was created at the beginning, and that remained empty for the whole duration of the tutorial. Now is the time to fill it.
Its purpose is to specify the order and timing of each picture and video, and what the sections are. You will see what I mean by that shortly.
I won't explain the details of what an entry is, everything is already explained in this blog post. But that post does not explain sections so I will do so here.
First, open the "Track_example.txt" file in a text editor like Notepad, Notepad++ or Scite (I use the latter).
The track will need to specify, for each picture and video, how much time it must stay on screen, so that's what we're going to do now.
We have 8 SD pictures, 2 HD pictures and 4 videos, so that's 14 entries in total. If you forget one, it won't be played by the HD Video System or RemVision at all even if you have uploaded it and put it in the tape. However, there are more than 14 textures in the folder, since some videos yielded more than one texture, and the HD pictures both generated 4 textures each. But you won't reference any original file more than once.
Let's not be too creative there... Let's decide we want each picture to show for 60 seconds and then the next one replaces it, then the next etc. Here is how the track file looks :

Notice that I never wrote any of the parameters contained in the names themselves, only the names and nothing else. The tape track scripts will figure out how to grab the parameters from the textures that I will upload later so no need to repeat them here.
The very first entry is there to avoid confusing RemVision which adds a dummy "Begin" section at the beginning, and I've had trouble in the past when I didn't write this "+1 :: $" line.
Each other entry is a timing (+0/+60) and a file name following a dollar sign because it is a picture or a video. As you can see, they are all written in order. There's no creativity here, I should actually write a script to do it automatically one day. I made one in LSL that I included in the HD Video System but I need to make one in Python. But I digress.
Now suppose we want to group some entries, and to let a RemVision play all these pictures in a random order (the HD Video System cannot play in a random order, only sequentially). To do this we need to define sections, because RemVision can play sections in a random order but all the entries inside the same section will be played in the order they are written. This is on purpose.
Since the section names are copied into the RemVision plugin, it is better to choose short names otherwise a memory shortage may ensue and crash the script. But I'm talking a hundred sections, which is far from the few sections we will write here.
A section is a subtitle that begins with a "!", therefore an entry that begins with "!!" since subtitles already begin with "!". The HD Video System and RemVision do not display those subtitles, and the RemVision plugin stores them so the user can define manual playlists, but other than that they are simply subtitles, and as such follow the same syntax and are stored in the subtitles track script.
Let's see... I'd like to group EXsd007, EXsd008 and EXv001 together because it's the same model (Susan Wayland, even though for the video I'm not 100% sure but whatever), EXsd003, EXsd004 and EXhd001 together because it's full body latex, and the rest will be one entry per section.
It now looks like this :

Save the track
Now that the track is done, copy and paste it into the "*Track audio video subtitle" notecard contained inside the tape, then save.
Upload the files
Ok so now comes the painful part. Painful for your wallet, that is. You will need to upload every single one of those textures, PNGs and JPGs alike. In my folder, that means 38 files exactly (16 JPGs and 22 PNGs). That means L$380 to pay to create that tape, plus maybe L$10 to make the tape label (unless you want to use one of the uploaded textures for that).
But please don't upload the files contained in the zip you downloaded, I have already uploaded them for you. They are inside the "Example RL pics (work)" tape contained in the "Making Movies - Free Tools" box.
Place the files in the tape
Nothing to say except edit the tape and put all the textures in it. Please note that you should not put too many textures in one sweep, try to insert 30 or 40 items, wait a few seconds, do the same with the next 40, wait etc. This will avoid the "inventory creation failed" error from the sim (and you'd notice the failure once you record the tape). Of course, for this example here, there are only 38 textures to insert so this won't be a problem.
Record
Click on the tape and select "Record All". If all goes well, the scripts will read your track notecard and hopefully no texture will be missing (otherwise, see above and you'll need to insert the missing textures again). Once done, the tape is ready to play !
Enjoy !
Now is the time to watch your video and see if there is any issue. If you find an issue, probably all you'll have to do is modify the track notecard and record again.
Optional : Create the tape label
By default the tape label is plain white, but you may want to make your own. No need for a tutorial here, if you can use Gimp or Photoshop, feel free to make your label, if not, you can use any one of the texture that you've uploaded, and offset and scale it so it looks good enough for you.
Finalize
Once you're happy with your movie, take a copy of the tape in your inventory. Then click on the tape in-world and press "Finalize", then "YES". All the content except the notecard and scripts will be removed and you will be ready to share or sell your tape. Don't forget to change the permissions !
That's it, I hope you will find this tutorial easy, and that you will enjoy producing your own content !
Marine
Saturday, March 16, 2019
A gift for you.
Hi there,
I have a gift for you ! No, not this one, another one...
But to know what it is and to be able to use it, you first need to update your HD Video System and/or your RemVision because I had to substantially modify the process script (the one that turns videos into frames for SL) so that it can handle non-square videos with non-square numbers of frames. It doesn't sound much, but it makes it a LOT more powerful than before. In the past, it could only process square videos and that was very limiting. The same goes for the screens of those two products, which too have to be able to display non-square videos.
In this update, you will find the following changes and if you pay attention, I think you will have a hint of what the gift is all about. If you don't already have a clue, that is.
HD Video System
* The two screens are now able to handle non-square videos.
* The player can now display times longer than 100 minutes without shifting the Play symbol.
* The screen seemed not to be able to display colors for subtitles (unverified and unheard of, but I have corrected the code anyway, just in case).
To update your HD Video System, simply rez the update orb contained in its folder and you will get your new HD Video System automatically.
RemVision
* The screen is now able to handle non-square videos.
* Increased the chat limiter to 110 lines from 90 (it should still not trigger the infamous chat throttle).
* When a new tape is being copied, it displays static over the eyes during the copy for a nice little effect (*), then resumes playing if it was playing before. It also re-shuffles the playlist if the playing mode was "Random" (otherwise it switches back to "Sequential").
* Made the inner lenses (the surface where the projected picture is) glow 10%. You can set it to whatever you like manually, the script does not modify the glow at all, but I find 10% to be good. (*)
* The lenses displayed tall pictures (pictures that are taller than they are wide) stretched the wrong way.
* The ear pieces are now invisible by default. It makes more sense because they don't restrict hearing by default.
* The outer lens (the one that shows the texture you select, like Blank, Realistic and such) is now invisible in the "Lock" lock, but you can still turn it visible by selecting "Always max" in the Lenses Opacity menu of RemVision. (*)
* The screen seemed not to be able to display colors for subtitles (unverified and unheard of, but I have corrected the code anyway, just in case).
* When clicking and dragging the screen, it limits the dragging in a way that you can't move it away enough to see what it was hiding before dragging it. This now takes the state of the background ("None", "Black" or "White") into account, meaning that if the background is invisible, the screen will use the visible prims (the ones showing the movie) to know how far you can drag it and where to stop. In the end, you can't see what's behind the screen no matter how far you drag it.
(*) If you use the unrigged lenses instead of the rigged ones, you need to use the new ones after getting the replacement, as the old ones don't have that feature.
To update your RemVision device, you need to go to one of these locations :
My Little Shop
Chorazin's store
Roper's Dark Playground
Dark Wishes
Once there, click on the updater and follow the instructions. You need to choose "REPLACE". Don't forget to save your times before requesting a replacement. If you do not get a "REPLACE" option, contact me (Marine Kelley) to get a manual replacement.
There is a known issue that does not have any solution that I know of. Since now the animated pictures can have empty frames in their textures (but you won't see them since the screen won't play them, it plays only the non-empty frames), clicking on the screen will reset the animation back to its first frame. It's not a big deal, but it's a change from before when clicking on the screen would re-synchronize at the current frame. Now it re-synchronizes at the first frame, that's all.
Python scripts for movie creators
(This section is relevant to you only if you create movies and/or slideshows)
It's funny, but the core of this update is not even the HD Video System nor RemVision. It is mainly the AviToTextures.py script, the one that is used for turning an AVI file into a set of textures with frames that SL can display as an animated picture over several prims.
Before this update, this script could only handle square videos with a square number of frames, or would decimate the frames until reaching a square number. This was good but too limiting, in particular when dealing with animated GIFs from the Internet, which can have arbitrary dimensions and numbers of frames, but small enough a number making decimation out of question.
As a result, you now need to specify the dimensions of the AVI when calling this script, and you now have the ability to specify the target number of frames you want in the final montage (or indicate a decimation factor like before). It will organize all the frames composing your video into the textures in the best way possible while sticking to the original ratio (Width / Height) to avoid any deformation. The result on-screen is much better than before. I'm thinking of ways to make this script obtain the dimensions and the number of frames of a video by itself so you don't have to specify those data in the parameters anymore.
I have updated HdTextureToSdTextures.py to get rid of the requirement of specifying the dimensions of the picture, now it figures it out all by itself.
I have also created a new script named RenameWithDim.py that will automatically rename all the images in a folder on you hard drive with the appropriate dimensions so you don't have to do it yourself.
If you want to update the Python scripts on your hard drive, simply go get them from my Dropbox account, the urls are in the Director's Manual notecard of the HD Video System, and in the blog post linked below.
I have reflected all those changes in the Making Movies - Video blog post.
The Gift
So... You've read this far and you really want to know what this gift is all about, don't you ?
Now I can tell you what it is !
The gift is a box containing three tapes full of bondage pictures and videos coming from the Internet. The pictures are more or less organized in themes (Fetish, Ropes, Cuffs, Sex, Straps, Duos and some other sections) and all three last three hours average, counting one minute per picture or video. This means hundreds of pictures and videos ! And not the shabby ones either.
This is where you see the new script shine, as all the animated pictures come from GIFs without losing too much quality. Some are even exactly like their original files without any loss.
The tapes are designed to be played in random order for a better experience, so the sub never knows what to expect. The section names are very short because they are stored in the RemVision plugin, which would crash if they were any longer. They are usually just a letter and a number (not always consecutive due to how I had to move some pictures from one tape to another) and reflect the type of the pictures and videos. R for rope, F for fetish, X for sex, S for straps, D for duo, C for cuffs.
You may ask yourself, why this gift and why now ? There's no special occasion. I've just wanted to improve my animation script for a while to allow for non-square videos and to prove how easy it is to use once it was operational. So I will probably write a blog post to explain how I made those tapes (pictures, videos and tracks) to encourage you to do the same :)
You can get the box containing the tapes for free at My Little Shop :

Have fun !
Marine
Thursday, March 7, 2019
RLV 2.9.26.1
Hi,
Here is a new version of the RLV with even more bug fixes, including for the infamous "attachment loss after teleport" bug, and for that one I'm far from being alone to work on it.
I took Henri Beauchamp's fix (with his permission, thank you Henri) as well as Chorazin Allen's integration of the fix from Firestorm into Kokua (with his permission too, thank you Chorazin, and of course thank you Ansariel and Kitty for working on it in the first place), added them to my own (introduced in RLV 2.9.25 and a little more in 2.9.26), shook the whole cocktail a little and voila.
I've tested and seen this bug occur with each fix taken separately, sometimes an attachment would go past Henri's fix, some other times it would go past Ansariel's fix. Even with two of them in the code, sometimes an attachment would go past both fixes one after the other (it was rarer, but it happened).
But with all of them I have yet to experience one attachment loss, and I TP a lot with a lot of attachments on my avatar, so yay ! Well I hope yay. In any case, it seems a lot more stable than before, so let's hope this bug is finally behind us now.
There was also a small bug introduced in RLV 2.9.26, well it's not really a bug but a side effect of one of the fixes mentioned above, which would make Bento-rigged attachments using animations containing bone displacement (for example neko ears) revert back to their original locations after a teleport and even a rebake wouldn't fix it. This should be fixed by the fixes mentioned above, but I have still seen it happen in this version, albeit very rarely. If this happens to you, press Ctrl Alt T twice (that shortcut highlights invisible surfaces in red) and it seems to fix it. I don't know why yet, but at least we have that option. Also the bug was only seen in local, other people would not see it, and so is the fix.
Lastly, I have added three useful shortcuts for builders :
- Alt+S to return to the standard Move tool (it also deactivate Edit Linked and selects the whole object, otherwise the selection would look weird).
- Alt+X to select by face.
- Alt+C to switch to Qarl Linden's Align tool.
Speaking of Qarl's Align tool, I have reinstated it in the Edit window, something I forgot to do in 2.9.26. The code was there but the UI file did not contain the "Align" entry, sorry about that.
You can grab the Windows version here :
http://www.erestraints.com/realrestraint/
The MD5 hash for the Windows executable is :
eac265ca376bfc75e664888627852820
Have fun !
Marine
Tuesday, March 5, 2019
Update to RemVision
Hi,
Following right on the tracks of the last update to RemVision, here is yet another update, this time to crush most of the remaining bugs and more importantly to make all the older movies (mainly Gina's adventures) compatible with RemVision at last ! In fact, most of the bugs fixed here could not occur until one tried to play one of the older movies, due to some specificities that are proper to their tracks.
- Changed : When the screen is set to "small", move it a tad up or down towards the middle of the screen to avoid hiding the subtitles under an hypothetical button bar (that's mainly for the SL viewer and the RLV, I don't know how it fares in other viewers, that depends on whether the 3D viewport includes the lower bar buttons or not).
- Changed : When clicking on the screen, zoom in to 2x regardless of the initial size.
- Changed : The wearer cannot zoom out lower than 2x anymore (therefore they cannot make the screen smaller than it is set to be).
- Changed : When dragging the screen, it won't allow drag in a way that what was hidden behind it before could be viewed. For example, if the screen is set to take the whole view and is not "small", the wearer cannot drag it out of the way to see what's behind it anymore.
- Fixed : Starting an animated picture showed the whole texture (with all the frames) for a split second.
- Fixed : When the movie is running but does not display a picture, do not display a picture on the lenses either.
- Fixed : "Could not find sound '1'" error from the screen when attempting to play one of the older tapes.
- Fixed : When setting the background to black, it disappeared as soon as the next picture was displayed.
- Fixed : The screen was flashing while dragging it around with the left mouse button.
- Known issue : If the movie is paused on an animated picture and the user zooms in, the currently displayed frame is replaced by the whole texture, showing all the frames at once.
- Known issue : When watching a movie with subtitles while blindfolded with RLV 2.9 vision spheres active, the subtitles may fade out unless the screen is brought to the front.
To update your restraint and benefit from these changes, you need to go to one of these locations :
My Little Shop
Chorazin's store
Roper's Dark Playground
Dark Wishes
Once there, click on the updater and follow the instructions. You need to choose "REPLACE". Don't forget to save your times before requesting a replacement. If you do not get a "REPLACE" option, contact me (Marine Kelley) to get a manual replacement.
Replacement is needed because some changes occur in a child prim of the RemVision main object (the Tracks prim to be precise), and others occur in the screen. If you use the unrigged version of the lenses, no need to use the new ones and resize them, the old ones will still work just fine.
So that's the change list. Now, for the interesting part. Like I said above, most of these changes are fixes for bugs that arose when I made the older movies compatible with RemVision.
What movies am I talking about ?
These movies :
Applicant Payback
Gina's Debut
Hot Mouse
Rocket's Tail Part 1 and 2
The Wait Part 1, 2 and 3
All the other, more recent movies (Alis, New Life...) were already compatible with RemVision out of the box but the older ones were made a long time before RemVision was released.
If you are willing to update these movies in order to watch them in your RemVision (or force your sub to watch them in hers), it's easy.
Simply go to the Marketplace, then click on "My account", select "My order history" and locate the movies. For each one of them, click on "Redeliver item" and you'll get the updated product.
Remember, to copy a tape to your RemVision or that of your sub, click and hold on the tape after rezzing it to get the menu. If you simply click on it, it will look for a HD TV player to insert itself into.
Almost forgot, if you watch a movie with subtitles on RemVision, it's better to set the background to "black" instead of "none", because because of the dimensions of the pictures, the subtitles are displayed below them.
Have fun !
Marine
Subscribe to:
Posts (Atom)

