Today I am releasing my latest product, the Proud Girls !
Wait, what girls are we talking about ? Am I selling slave girls now ?
No, no, we are talking about these girls :

You got that right, the Proud Girls are a pair of fitted mesh breasts specifically made for the Maitreya Lara mesh body, thereafter called "Lara" for short, in case you find Lara's breasts to be too small to your liking, even at breast size 100. The Proud Girls' size 40 is equivalent to Lara's size 100 :

Lara size 100

Proud Girls size 40
While their size 100 is equivalent to... well I'll just say that they can get pretty big.


I need to point out that the Proud Girls are not just for those who like big breasts, but also for those who want a different, more natural shape for their breasts, even without going wild with the size.
This blog post is going to be long because there's a lot to say about these breasts (who knew there was so much to say about tits ?). The first half is dedicated to demonstrating the product, the second half is the actual manual, which will get pretty technical at times, but don't worry, you won't need a scientific degree to understand this stuff. The way I see it is that the demonstration will hopefully make you want to at least try the demo, and if you actually buy the product, the manual will be there to answer any question you might have while using them. Knowing that nobody likes to read manuals, the menus are supposed to be intuitive enough to be useful without having to read anything.
To get one thing out of the way first, they are made only for the Maitreya Lara mesh body, and I do not plan to make a version to fit Slink, Belleza or any other mesh body, sorry. It was already a huge amount of work fitting the breasts to Lara's body. So if you do not own a Maitreya Lara mesh body and do not consider switching to it in the future, these breasts are not for you (there are other excellent fitted mesh breasts on the market though, such as Lolas Delicq, Nifty Bits, Fitted Puffy, Tiny Things Gummies, to name a few). I had good results wearing them with an Abar eBody as well as a Slink Hourglass mesh body, but the seams are visible there, of course, since the rigging and shapes are not the same as Lara's.
The Proud Girls are designed in a way that they completely cover Lara's vanilla breasts without any clipping, they move and deform exactly like them when wearing physics, and the seams (the visual breaks at the edges of the attachment) are barely visible as you can see on the pictures. In fact, it takes a strong light at a shallow angle to see them. That way, you do not need to hide any part of the mesh body while wearing them. You can hide the part between the breasts if you wish, so a semi-transparent top worn on the Top layer of the breasts and the Clothing layer of Lara wouldn't clip through and render twice, but that's entirely your choice.
The animation below shows them swinging while I'm running, I must point out that no part of my Maitreya Lara body is hidden, the vanilla breasts are just completely covered by the Proud Girls. Watch them dance !

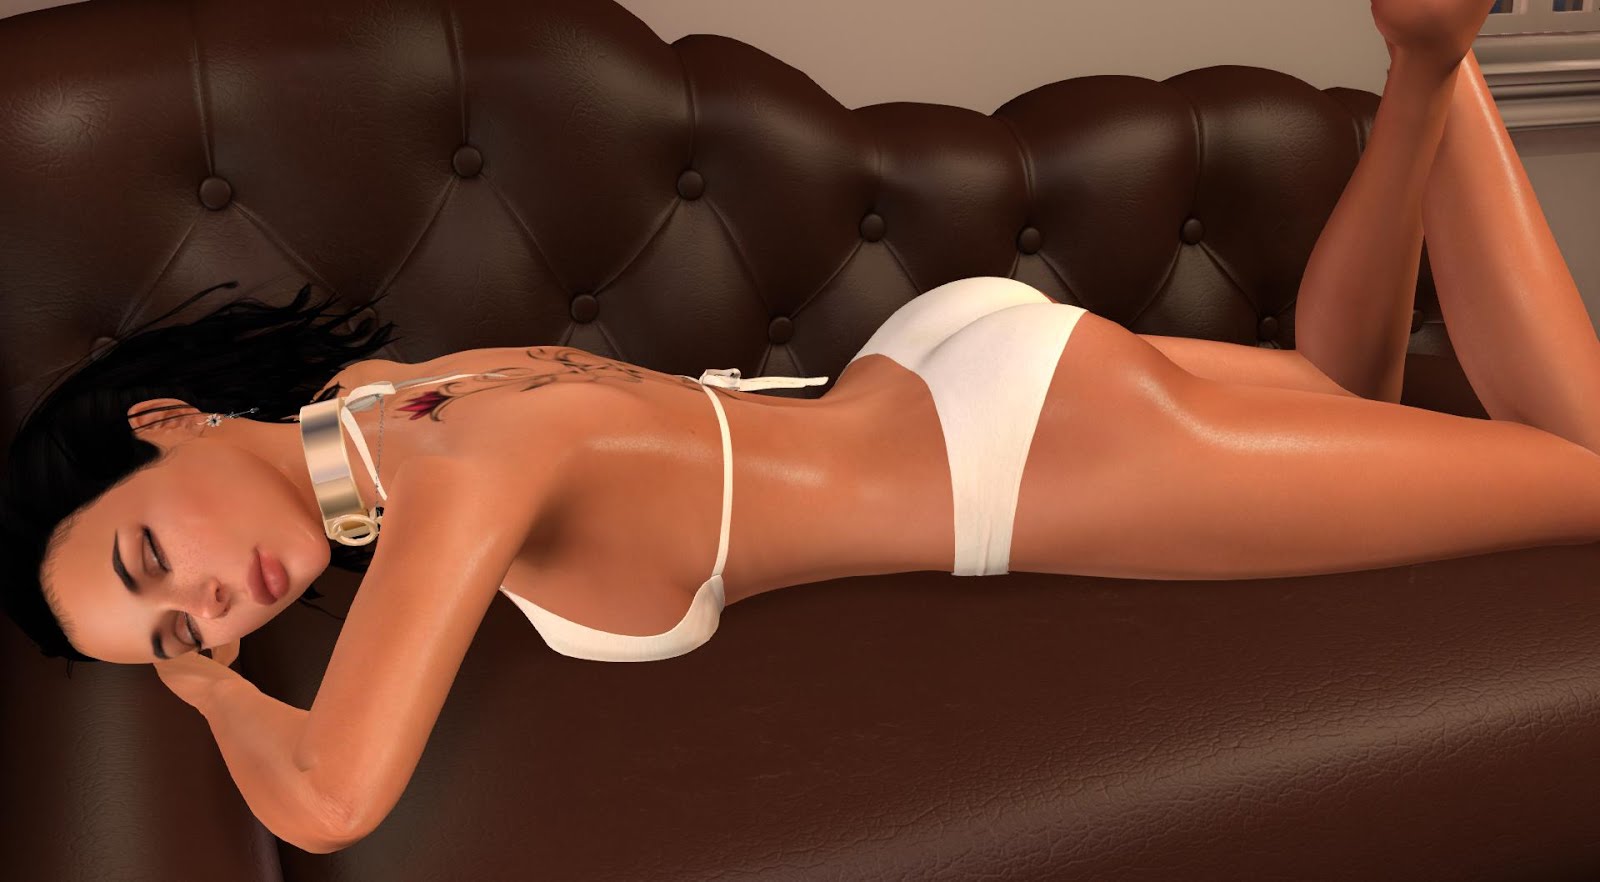
Here are a few pictures showing them from different angles :


User interface
The Proud Girls breasts are entirely controlled through menus, they don't use a HUD. It was a choice early on because I did not want to force you to wear yet another HUD, taking yet another attachment slot which is becoming a rare and precious commodity these days, due to all the stuff we have to wear to look good. Don't worry, the menus are made to be straightforward and streamlined, enough to sustain an intensive daily usage without driving you nuts. I'll explain the usage of the menus later on in this post, in the manual section.
They are made in such a way that they are controlled exactly the same way as the Lara mesh body and follow the same logic. They do not use the Maitreya applier protocol though, which is proprietary (it would have been great, but I asked Onyx and she didn't agree to let me use her protocol). Instead, they use the Lolas and Omega protocols. You can turn the support of both protocols on and off independently. This means that if you bought a skin applier for your Lara mesh body, you'll probably need to buy its Lolas version (if it exists and you don't already have it) to apply the same skin to the breasts. If it doesn't have a Lolas version, maybe it has an Omega version, but it might be as expensive as your Maitreya applier since it would apply to the whole body. It depends on the skin vendor, really.
There are five skins included in the product that apply to Lara, to any Omega-compatible mesh head (but the box also includes the actual skins, moddable in case you want to tint them), and of course to the breasts. Those skins are not just demos or freebie skins, they are fully usable, well defined and realistic. If you really can't find a Lolas or Omega version of your favorite skin, or won't spend money for it, you can still use one of the five provided skins for your breasts and tint it until you are satisfied. I'll explain below how to do that.

Pale

White

Asian

Tan

Black
(I didn't forget to lighten the palms and the soles, even if it doesn't show on this picture)
Layers
Like the Maitreya Lara mesh body, the Proud Girls have four layers : Skin, Tattoo, Bra and Top. Each layer can be hidden and shown individually, its shine and/or layout modified, and you can swap a layer with another.
Like on Lara, you can make each layer masked or blended (the equivalent of "Mask Mode" on/off on the Maitreya HUD, respectively), and their mask cutoff is the same as Lara's.
You can also make the whole breasts visible and invisible in case you are wearing regular mesh clothes not fitted to them... provided you are allowed to hide them in the first place ! Because yes, those breasts can be controlled and locked by someone else if you let them ! Once again, more on that later on.
Piercings
They also come fitted with three different piercings that you can hide, show and tint individually : rings, barbells and a chain :

Rings

Barbells

Chain
They are rigged to the breasts so they move and deform like them. If you are wearing applied clothes, they may be hidden automatically if the appliers are set to cover the nipples (if not, you can do it manually too, there's a button for that).
You can also wear several or all of them at the same time, they are designed not to conflict with each other :

Rings + Barbells + Chain
Those piercings can even be... ahem... leashed. More on that later on.
Nipples
The Proud Girls breasts have three states of nipples : flat, normal and swollen. They don't use separate alpha-blended mesh nipples for that (which would cut through any transparent layer such as sweat or a see-through bra), but are actually part of the mesh breasts themselves. The Tattoo and Bra layers also have these three nipples states so you can wear a bra and still have the perky nipple look.

However wearing a top with the "cover" option set makes the nipples flat and hides the piercings.

As some appliers are meant for clothes that cover the nipples while others may leave them free, Lolas appliers have the option to automatically cover the nipples when applied. Omega appliers don't have this option though, it has to be done manually. This means that if you apply a Top through Omega and your nipples are Normal or Swollen, they will poke through and you'll have to click on the "Cover" button in the menu.
Shine
The skin and clothes can shine just like the Lara body, that way you can match the shine of your skin with the Shimmer value you set on your Maitreya HUD, for instance, or the shine of your clothes with the Glossiness value from the same Maitreya HUD. More info about this in the manual below.
Here is a picture of a high Shimmer value on Lara, coupled with a value of 200 for the "Skin shine" value in the Proud Girls :

And a picture of a high Glossiness on Lara, couple with a high "clothes shine" on the Proud Girls :

RLV restrictions
There we go. You didn't expect me to release mesh breasts without putting some RLV into them, did you ?
When you get the breasts, their access is set to "Captor & Wearer Only". This means only you since you are your own captor until you let someone else control your breasts. Once you do, someone can lock them on you and when it happens, the breasts can no longer be removed or edited until they are unlocked.
While locked, the captor can issue restrictions like preventing you from hiding the breasts, or modifying the textures and/or materials (so you can be sweaty but not dressed, for instance), or removing your piercings, etc. They can also set a timer and of course, decide of the access level.
Accessories and Leash
The breasts are made to allow for plugins to be added later (they are called "accessories"). One plugin, or accessory, is already available and it is the Leash. Thanks to this accessory, the captor can actually leash you by your breasts (regardless of whether you are wearing the built-in piercings or any other kind of accessory that may be made later), and the leash works exactly like the RealRestraint one. In fact, it is the same script. This means that while leashed you won't be able to teleport, and you won't be able to refuse a teleport offer from your captor. And of course, you won't be able to walk far from whoever or whatever you are leashed to.
All these restrictions require RLV to work, of course.
Modifications
The breasts are modifiable so you will be able to tweak them, to link them to other attachments to save attachment slots, and the like. The scripts are made so that it doesn't matter if they are not in the root prim, so feel free to link, unlink, tweak... Knock yourself out.
Development kit
There is a development kit available to anyone who wants to design mesh clothes and accessories for the Proud Girls. You can find it here.
What you get in the box
The box contains the Proud Girls (obviously), an updater to rez, a gesture to summon the menu, several skins and an applier to apply them to your mesh body, breasts and/or mesh head. Plus a couple modifiable physics wearables (nude, covered, hold still).
That's about it for the demonstration. You can find the Proud Girls at my store on the Marketplace, they are Modify, Copy and No-Transfer and cost L$800. The box contains an updater to rez in case an update is available for this product, updates are always free. Also if you ever break your product, rezzing the updater will automatically get you a redelivery (if you lose the updater, simply IM me, Marine Kelley, to get another one). Please note that since this product is no-transfer, there is no refund so all sales are final, I can only refund double purchases.
Please try the demo first !

The rest of this blog post is the actual manual for the Proud Girls.
Manual
Wearing the Proud Girls for the first time
The Proud Girls breasts are worn on the chest and are comprised of a few unrigged invisible prims (they're spheres, you can see them with Ctrl-Alt-T), plus a few rigged objects such as the breasts themselves and the piercings. It is possible that you see the menu right away because the main scripts reset on owner change, don't be spooked by that.
The skins
Chances are you already own an applier for your skin that uses Omega or Lolas. If you don't, you will want to buy one, let's hope it won't cost as much as your skin.
If you don't want to buy an applier for your breasts to match the skin of your Lara mesh body, then you have two options.
The first option is to use one of the five skins included in the box. To do this, wear the "Proud Girls skins applier" object, which will show a HUD with 16 buttons :

Each column is a skin shade, from pale to black. The top row applies to your mesh head through the Omega protocol (hence the Omega symbol), the middle row applies to your Proud Girls, and the bottom row applies to your Maitreya mesh body. In other words, if you wear a mesh head that is compatible with Omega, you will want to click on all the buttons in a column to apply to your entire body, breasts included.
If you don't wear a mesh head, then you will want to wear the corresponding skin wearable instead.
The 16th button is the "M" symbol which leads you to my Marketplace store.
The second option is to choose a shade that is closest to your own skin and to tint it. To do this, bring up the menu and go to "Maintenance", then press "Skin tint ?" and enter a RGB value, one that tints the breasts close enough to the natural tint of your skin. There won't be miracles though, the blending won't be as good as if you had your own skin applied to it, but I'm sure it will be good enough. The main issue is to find the RGB value in the first place.
For example, suppose you own a League Sunkiss skin (that's my skin, the one you see on the pictures), and suppose you don't want to buy the Lolas applier (it wasn't expensive last time I checked, but it's your money not mine). In this case, you may choose to wear the Pale or White skin on your breasts and tint it. Let's say you choose Pale, which is the one with the least saturation so the best gamut when it comes to tinting it :

League Sunkiss with the Pale skin on the breasts
The best way to go is to select just the skin and to tint it manually (just to find the right tint). Here is how :
1. Select the breasts.

2. Tick "Edit Linked" on the Edit window.

3. Select just the skin. This is the hard part as the viewer might not be cooperative. The skin layer is the one most underneath (notice the mouse pointer on the following picture), you have to move your camera so the nipples clip through it, that's the best way to select that layer.

4. With a bit of luck an patience, you'll manage to have the skin selected, and only it.

5. You'll need to hide the highlighting so you can tint efficiently. To do this, go to Build > Options and uncheck "Show Selection Outlines".

6. Ok now you're ready to tint your breasts. Click on the white rectangle in the Texture tab to modify the tint.

7. A good idea is to turn off all the local lights (or to turn their rendering off in your viewer preferences) and to set the time to Midday so the Windlight settings don't tint your view too much.
8. Experiment with the color until you find one that is close enough to the natural color of your skin. Apparently RGB 209 160 136 works rather well with Pale to match League Sunkiss. Of course I would have been better off using White or Tan as a starting point but this is for the sake of the demonstration.

9. Now that you have a good tint, save it somewhere in a text file, but also commit by entering it in the Proud Girls menu that I mentioned above ("Skin tint ?"). That way you won't have to do it every time you update your breasts.
10. Naturally, it cannot be perfect. The very best choice is to buy the Lolas or Omega applier for your skin, if you don't have it already. This is the only way to have a perfect fit.
There's another thing you may want to do with the tint. Suppose you want to switch to one of the skins included in the box. They look good enough for normal use anyway, they're not just cheap skins. But none of the shades corresponds to what you really want. Fortunately both Lara and the Proud Girls can have their skin tinted. Unfortunately, the former wants a HSL color (Hue, Saturation, Luminosity) while the latter uses RGB (Red, Green, Blue). HSL and RGB are two different ways to encode a color in a computer. So how to make sure you choose the same tint ? How do you translate one into the other ?
First choose the tint of your Lara mesh body on your Maitreya HUD. Let's say 21 52 86. Let me remind you that this is HSL, not RGB.

Doing this tints the whole Lara mesh body, including hands and feet. Obviously not your mesh head if you're wearing one, but that's another story.
You now need to turn this into RGB. To this, you can simply rez a box on the ground before you and tint it with the same HSL numbers :

The RGB values are written just above, automatically calculated by the viewer. Here, this gives you 238 214 201. Enter these numbers in the "Skin tint ?" text box and you're done !
What you just did, you can also use any paint program (Gimp, Photoshop, Paint.NET) to do the same calculation for you. Or go there, this might be even easier for you.
Applying your skin and correcting the layout
You might wonder why I'm dwelling into technical details about skin tint and layout right at the beginning of the manual, even before explaining how to use the menus. The reason is that applying your skin will be the very first step, and more often than not, you might be surprised by the result.
The layout of a layer is the double pair (Scale U : Scale V), (Offset U : Offset V) that lets you decide how the texture is scaled and offset over its surface. "U" stands for "Horizontal" and "V" for "Vertical", this is where the term "UV map" comes from. There is one layout per texture channel, in other words one for diffuse, one for normal and one for specular. Generally all three channels use the same layout, but not always. An example of this is the skin layer that uses (0.5 : 0.5), (0.75, 0.25) for diffuse (the actual skin texture, what gives it its colors), (2.0 : 2.0), (0 : 0) for the normal (what makes it bumpy) and (0.5 : 0.5), (0.75 : 0.25) for the specular (what makes it shiny).
All four values are between 0 and 1, the offsets can actually be negative but I don't recommend trying that, as the normal and specular channels don't accept anything below 0 or above 1 anyway, and clamp the values that are outside the bounds instead of making a modulo. This is a known issue in the Second Life JIRA. This is why you should use 0.75 and not -0.25, both give the same result.
The Proud Girls breasts do not care about the rotation, which is always 0.
When you apply your skin to the breasts, ideally the skin is applied without a flaw, i.e. the image of the nipples is aligned with the actual nipples of the 3D object, like on every picture you saw in this blog post until now. Usually, the layout for it is (0.5 : 0.5), (0.75 : 0.25) because the Proud Girls, like Lolas Tango, Delicq and others, use only the upper left quarter of a body top skin texture. However it is not always the case. For example the League skin I use is not perfectly aligned with this layout, which must therefore be modified. I'll show you with a practical example to make it clear for you.
Suppose you apply your skin to your breasts thanks to its Lolas or Omega applier :

You may think "yay, this worked" but hold on a minute and look from above...

Does it look aligned to you ? That's right, the nipples on the texture are just a bit too close to each other, which means the texture must be stretched (so the scale must be lowered). After a bit of experimenting, you find out that the perfect layout for this particular is (0.488 : 0.5), (0.751 : 0.25). It takes some editing to do that, unless you like entering numbers in a text box, and unfortunately the perfect layout varies from applier to applier, but if you enter "0.488 0.5 0.751 0.25" in the "Skin layout ?" text box in the "Maintenance" menu, here is what you get :

Now it looks good !
This layout issue is a plague for a lot of mesh breasts, and it is not really the fault of the mesh breasts themselves, which are usually (like the Proud Girls) correctly UV-mapped. It's just that some skins require some tweaking. Sometimes their appliers take this into account (an applier is able to specify the layout directly), but others don't and let you do the work yourself. At least you have a way to do that here.
One bit of help if you are a League user like me. I noticed that the Lolas League appliers look like the skin is mirrored. If you use one of them to apply to your Proud Girls, you quickly notice the edge between the breasts, against the chest. To remedy to this, I find that the layout (-1.01 : 1.0), (0.025 : 0) works well and makes that seam barely visible. Notice the minus sign before the U scale value, this means the texture is mirrored along its U axis.
To recap : go to the "Maintenance" menu, press "Skin layout ?", enter four numbers and see the result on the skin layer. What I just explained also works for the three clothing layers but usually you don't bother with those, only with the skin.
Linking the Proud Girls to another attachment (advanced user only)
If you wish to link your Proud Girls to another attachment of yours that you always wear on your Chest or on your Spine so you can spare one attachment slot, you can. Rez both objects on the floor, select the Proud Girls first then the object to link them to, then press Ctrl-L to link, and wear the final object. Since most of the parts making the Proud Girls are rigged, it doesn't matter where they are worn on the body, they will always show on the chest. However, some parts are not rigged (the toucher prim and the leash points) so it is best that you link your Proud Girls to an attachment that is worn on the Chest or on the Spine so the unrigged prims still move with the upper body. Otherwise you'll get surprises.
Remember that if you make a mistake and want to start over, you can always rez the update orb to get a new box. The update orb doubles as a redelivery client.
Using the menus
The menu of the Proud Girls shows up by saying "menu" on the chat channel 13 by default. In other words, say "/13 menu" (without the quotes) and you get the menu. If you activate the "Proud Girls Menu" gesture, you get the same result by pressing F4. This gesture is modifiable so you can change the channel it calls the menu from, since the command channel itself can be changed to something else than 13.
It also shows by touching the breasts, by default only you can touch your own breasts until you set the access to public.
Calling the menu from a command channel is an ability that can be restricted by whoever locks the breasts. More on that below.
When you call the menu you always end up on the main page, which looks like this :

Main menu
* The buttons on the left let you toggle the visibility of each layer individually, or of the whole breasts (the "VISIBLE" button).
* The column in the middle lets you swap two layers (Top <-> Tattoo, Bra <-> Top and Tattoo <-> Bra) and clear all the layers at once (the equivalent of the "Clear All Layers" button on the Maitreya HUD).
* The right column lets you access the sub-menus : Layers, Nipples, Accessories and Maintenance. Please note that if anyone else touches your breasts and gets this menu (provided you set them to public access), the "Maintenance..." button is replaced by a "Lock..." button, which leads to the "Lock" sub-menu that the wearer cannot access.
Meaning of the symbols
Each button follows a rigorous naming scheme so you know exactly which button does what after only a few uses.
* If a button label follows a box, it is a toggle, or a checkbox if you prefer. When the box is empty the toggle is negative, if it is full the toggle is positive. For example, "[ ] Bra" means "the bra layer is hidden", while "[#] Bra" means "the Bra layer is visible". In some cases the symbol is greyed out (it appears dimmer than usual), which means that pressing this button won't do anything, but it still gives you the value of this toggle. This happens when you are restricted by someone else.
* If a button label follows a circle, it is a switch. A switch is like a toggle except that only one switch can be valid at a time. It is the equivalent of a radio button on most windows. In this product, only the nipples are switches, as you can only show one state of nipples at a time. Since you can always change the state of your nipples, switches are never greyed out.
* If a button label ends with an ellipsis ("..."), this means that it leads to another menu. It doesn't have any other effect than this.
* If a button label ends with a question mark ("?"), this means it will ask you a question in a text box. For example, the shine of the top layer, or the layout of the skin. To enter a text there, simply write it, then hit Tab then Space to validate. Hitting Enter won't validate, it will simply go to the next line (which can be useful in the case of layouts, see below). If you validate without writing anything, it will switch back to the default value.
The layers
The Proud Girls are comprised of seven layers :
* Skin
* Tattoo
* Bra
* Top
* Rings
* Barbells
* Chain
Yes the piercings are treated like layers internally but let not that be a concern for you.
You can hide and show each layer except the skin individually by pressing the corresponding toggles in the menu. The "Main" and "Layer" menus let you switch the tattoo, bra and top, and the Nipples menu lets you switch the rings, barbells and chain.

Layers menu

Nipples menu
To completely hide and show the breasts, toggle "VISIBLE" in the Main menu.
Toggling any layer does not destroy any information, the button merely hides and show the layer. Even "Clear All" does not remove any texture, it is merely a shorthand for toggling "Tattoo", "Bra" and "Top" off one after the other. It is equivalent to the Maitreya mesh body HUD's "Clear all layers" button, except the textures are not removed, simply hidden.
The skin, tattoo and bra have three nipple states that can be changed in the Nipples menu:
* Flat
* Normal
* Swollen
When you are wearing piercings, you cannot make your nipples flat (well you can but they will still appear like if they were set to "Normal" instead, until the piercings are removed).
When you apply something on the Bra or Top layer (not Tattoo) and the applier specifies that the nipples are covered (Lolas appliers only, Omega ones do not have this information), or you cover the nipples yourself with the "Cover" button in the "Nipples" menu, the nipples are automatically covered but retain their shape. The piercings however are hidden.
Please note that there should have been one "Cover" button per layer, but I'm simply out of room on the menu, so there's one "Cover" button for Bra and Top. Just remember that if you apply a bra or a top and the piercings don't look the way you want (they show while they should be hidden, or the other way around), you'll need to switch the "Cover" toggle in the "Nipples" menu.
Applying something on the Top layer automatically makes the nipples flat (unless there are piercings and the nipples are not covered).
Toggling layers and the visibility of the whole breasts is conditioned by restrictions put on you when the breasts are locked, see below.
The Main menu also features three "swap" buttons :
* Top <-> Tat.
* Bra <-> Top
* Tat. <-> Bra
As the name implies, those buttons are used to swap two layers. Every bit of data is then swapped : texture, normal, specular, layout, shine...
Attention : Due to a limitation with the Lolas protocol, a Lolas applier cannot apply to the Tattoo layer directly (Omega can, though, but the Proud Girls are unable to receive that particular message). But that's okay, all you have to do is apply to Bra or Top, then to swap with the Tattoo layer thanks to one of the three "swap" buttons.
Shine
The Tattoo, Bra and Top layers can have materials applied on top of their respective textures. Materials, technically speaking, are a way to make a surface look 3D and shiny by making its surface more or less rough and bumpy, and specifying which parts of it are glossy and which ones are matte. This makes a surface look a lot more realistic (not as realistic as PBR, but the SL viewer's renderer is not PBR yet so we make do with what we have).
In layman's terms, this means that you can have a shiny fabric for your top, or even sweat. The Proud Girls are no stranger to this, and any Lolas or Omega applier can apply materials on top of the textures. They cannot however change the materials of the skin, which are built-in, and if you modify them and break them, you can restore them by clicking on the "Restore mat." button in the "Maintenance" menu.
Unlike the Maitreya mesh body, appliers do modify the shine of the layer they apply to, but you can later change it yourself by going to the "Layers" menu and clicking on "Tat. shine ?", "Bra shine ?" or "Top shine ?" and entering a number from 0 to 255. If you want to match the shine with that of the Lara mesh body, here is a handy picture that shows how much shine to apply according to the slider you've set on your Maitreya HUD :

I've written the numbers above the button so you can get a rough idea by comparing the position of the end of the slider against the letters on the "Clear All Layers" button. For example, if your slider is roughly under the "Y" letter of "Clear All Layers", then the shine is about 175.
The "Clothes shine ?" button is a shorthand to change the shine on the Tattoo, Bra and Top layers. It is, for all intents and purposes, the equivalent of modifying the Glossiness on the Maitreya HUD.
You can also change the shine of the skin, which corresponds to the Shimmer value on the Maitreya HUD. Once again, you enter a number from 0 to 255 after pressing "Skin shine ?" in the same "Layers" menu.

Don't worry if the shine is not exactly the same on Lara and on your breasts, you won't see a difference even if you're off by something like 10. This is not exact science. Well, it is, but a difference of 10 points in shine won't really be noticeable.
Here is an example of matching the shines on the breasts (with the "Skin shine ?" button) and on Lara's skin (with the Shimmer slider) :

And an example of matching the Glossiness on Lara with the "Clothes shine" on the Proud Girls, while wearing a latex bodysuit :

Mask
Some textures are semi-transparent and that causes trouble when several of them are stacked, some (generally the ones underneath) don't render at all. You certainly ran into that kind of trouble with your Maitreya mesh body more than once, and the only fix for this is to switch "Mask Mode" on for all the layers except one.
The same is true for the Proud Girls breasts. Switching "Mask" on a layer means making its mostly opaque parts be completely opaque, and its mostly transparent parts be totally invisible. A mask is simply a method of rendering a partially transparent texture by making it binary. Every part that is more opaque than a certain threshold (called "cutoff") will be rendered fully opaque, the other parts will not be rendered at all. This allows the renderer to be able to render other transparent textures underneath, even if they are not masked (they are then called "blended"). In our case, the cutoff is always 120, the same as Lara which cannot be changed.
To switch the mask bit on a layer, press the corresponding "Mask" toggle in the "Layers" menu.
Semi-transparent clothes
If you are wearing semi-transparent clothes such as a transparent latex catsuit, you want it to be applied on your whole body including your breasts. Problem is, there will be an ugly seam on the edges of the breasts as the transparent texture renders twice around that part :

Wearing a transparent black latex catsuit, notice the black seams where the transparent fabric is rendered twice.
You have several options to remedy to this. One is pressing Ctrl-Alt-Shift-V on the RLV to refresh all objects, and hopefully the seam will disappear for you. Another trick is to move your camera far enough then back to you, this will refresh the scene too. Yet another trick is to hide and show the layer on the Maitreya HUD, or toggle its mask mode. This latter trick is the preferable one as it never fails. I also suspect that it fixes the seam for everybody who is in the vicinity as well. At least until you teleport away or relog, and it won't fix the seam for those who arrive after you've toggled your mask mode.
The gist of it is that the Maitreya layer must be rendered as if it were applied last, even if it was applied first.
In the end, if you manage to get rid of the seam, you get this :

A nice seamless catsuit !
Wait, didn't I say that the SL renderer does not render a non-masked transparent texture underneath another one ? Yes I did, and it's true... to an extent. Actually it renders both if the surfaces are close enough, and this is what you are seeing here. The seams are the places where the fabric on the Lara mesh body and the fabric on the Proud Girls are so close that the renderer decides to render both of them. Don't ask me why it works that way.
Access
If you did not modify your Proud Girls at all, then only you can access them, either by clicking on them on your chest, or by saying "menu" on channel 13 (or by using the included Proud Girls Menu gesture, which does exactly this).
First of all, you can change that channel to another one by pressing the "Channel ?" button in the "Maintenance" menu, in case you need to use the channel 13 for something else.
Secondly, if you click on the "Access" button in the "Maintenance" menu, you will switch among the four possible access schemes :
* Captor & public : Everybody can access your breasts by touching them, except you if they are locked by someone else.
* Everyone : Everyone can access your breasts, including you.
* Captor only : Only the one who locked you can access your breasts.
* Captor & Wearer (default) : Only you and the one who locked you can access your breasts.

Maintenance menu
Until someone locks your breasts, you are your own "Captor". You become your own "Captor" as soon as they are unlocked as well. They are not locked by default. This means that if you want someone else to lock your breasts on you and restrict your abilities with them, you must switch the access to "Captor & public" or "Everyone".
You might wonder, can't you always access your breasts with "/13 menu" ? Well yes... until your captor decides otherwise. See below.
Locking
There is a menu you (as the wearer of the Proud Girls) do not have access to, it is the "Lock" menu. It takes the place of the "Maintenance" menu that only you can see, as it serves for modifying options on your breasts.

Lock menu
The "Lock" menu lets anyone who can access your breasts lock them on you (if you recall, you need to change the Access scheme for that first). If you are a RLV user, this makes them non-detachable and non-editable until they are unlocked. And while they are locked, your captor can set a few restrictions over your usage of your breasts :
* Prevent you from changing the skin.
* Prevent you from changing any texture, useful when the captor wants to lock the current outfit.
* Prevent you from changing any materials, useful if the captor does not want you to stop being sweaty (for example).
* Prevent you from calling the menu with the "menu" chat command, which forces you to have to click on your own breasts to get the menu... provided you can (you could be in cuffs and unable to touch your own attachments).
* Prevent you from changing the visibility of any layer, including the visibility of the whole breasts, meaning you cannot hide them anymore.
* Prevent you from changing the piercings.
* Change the access scheme to allow other people to unlock your breasts, or not.
* Set a timer before the breasts are unlocked automatically. This is counted in online time, and setting it to zero means deactivating it. The "Timer ?" button only appears when the breasts are locked.
You will then notice that your menus change quite a bit when some restrictions are set. For example, if you cannot change the visibility of your breasts, the "Tattoo", "Bra" and "Top" toggles in the "Main" menu become greyed out. You still see their states but you cannot change them. Some other buttons may even be hidden and replaced with a cross ("X"), indicating that those actions are not available to you.
Lolas/Omega support
The Proud Girls breasts are natively compatible with both Lolas and Omega (top) protocols. Without going too much into details, both protocols use the same channels and I know these channels, having worked on the second version of the Lolas breasts a few years back.
Problem is, the owner of Omega also knows these channels and used them to develop her own protocols. Worse, her protocols are forks of the Lolas protocol, meaning same channels and almost same structure, but not completely. This may have lead to conflicts, but the Proud Girls breasts are smart enough to detect which version of which protocol is a message they receive, and decode accordingly.
One thing that I mentioned above : the Proud Girls are natively compatible with Omega... without needing an Omega kit (since I know the channels and the protocol). However, I do not know the channel used by Omega for the Tattoo layer specifically so it is not supported for now. This means that if you have an Omega applier, its "Tattoo" button won't work with your Proud Girls, you'll have to apply to Bra or Top and then to swap to Tattoo in the Proud Girls "Main" menu. I don't really want to have to look for that channel, both because it would take so much time without any certainty that I'll find it, and because, well, that would not really be regular. I could also ask Chellynne from Omega to sell me a kit for the Proud Girls, but for now they support Omega almost entirely, well enough to be usable, so let's leave it at that for the moment. The problem I have with asking for a kit is that at some point the Omega script would have to send the UUIDs of the textures to the core script of the breasts, through a link message. And that is not secure at all unless that message is encrypted. Whether the breasts are mod or not matters little (and I insist that they remain mod).
In any case, Lolas and Omega are supported, you can turn both of them on and off selectively in the "Maintenance" menu.
One detail to know about : some appliers I've made in other products such as When You're Hot send both Lolas and Omega messages at the same time, the former to the bra and the latter to the top. The Proud Girls are programmed to ignore the second message if it contains the same information as the one before it, and comes less than 0.5 second later. That way you won't have a top and a bra applied at the same time by the same applier. It is a bit of a hack, but it was annoying during testing, and sometimes confusing.
Accessories
The Proud Girls are extensible by a plugin system that is very similar to RealRestraint's. You can go to the "Accessories" menu from the "Main" menu, and you are then presented a dynamic menu with all the contained Accessories, which are treated like plugins, i.e. scripts dropped inside the Proud Girls object and readily usable. In fact, an Accessory in the Proud Girls is equivalent to a Plugin in any item from RealRestraint.
Out of the box, the only available Accessory is the Leash, with which your captor can hold a chain going from your breasts (whether your piercings are visible or not does not matter) and force you to follow them. While leashed, you cannot teleport by yourself, and you cannot refuse a teleport offer from your captor. You also cannot go farther than a certain distance from your captor or whatever they have leashed your breasts too. The Leash Accessory is relog-resistant, and sim-crossing-resistant. Since it is the same script as the one in RealRestraint cuffs, it has been used daily for nearly a decade by thousands of people.
You can find the complete manual of the Leash Plugin (or Accessory in the case of the Proud Girls but that's the same thing) here.
Please note that the Leash requires the breasts to be locked in order to work. Unlocking the breasts automatically unleashes them.
Attention, you will notice that when leashed, the particle chains do not follow the Proud Girls nipples. This is an SL limitation against which I cannot do much... and believe me I have brainstormed on this one. In a nutshell, the particle chains come out of two invisible cone-shaped prims that are unrigged, hence not following the breasts physics or shape sliders. This is because if you try to make a particle chain come out of a rigged object, it does not visually come out of it, but out of the actual position of the object on the server. On this picture you can see the two cone-shaped prims, I moved them away from the nipples so you can see them clearly. The big red sphere is the actual prim to touch (that one too is unrigged). If you recall, you can show invisible objects by pressing Ctrl-Alt-T.

For example, if the two cone-shaped prims were rigged, they would follow the position of the nipples... but the particle chains would spawn from the spot on the chest where they are actually positioned, they would still not follow the nipples. Maybe in the future the viewer will link the visual position of the source of a particle chain with the visual position of the rigged prim they are supposed to spawn out from, but for now it doesn't work like that. It can be explained easily, a rigged attachment does not really have a position on the body, as it deforms along with its shape and animations. For example, what is the visual position of your mesh body on your avatar's skeleton ? Where would a particle chain spawn out from if you wanted it to spawn some ? Would that particle chain spawn from the nipples ? The navel ? The crotch ? There is no answer to this question, it depends on what you want to do. This is why, for now, we can forget about spawning particle chains from a rigged attachment.
I considered making a rigged chain attachment to link the piercings to a spot a bit below on the chest between the breasts that wouldn't depend on their size, and unrigged prim at the same spot from which to spawn one stream of particles. The leash would have looked Y-shaped that way. But this would have looked bad in most cases since tugging at the leash would make the particle chains look straight and forward, while the rigged chain (the upper part of the "Y") would remain straight and downward (since you can't animate rigged mesh yet). So the chain would look broken and not physically believable.
So instead of going down that road that is doomed to fail anyway, I decided to keep using the two unrigged prims, and you can move it yourself to match the position of the nipples, more or less. If the breasts swinging without the chains following bothers you too much, you will need to wear the "hold still" body physics to make them hold still (after all, if the breasts are leashed, they are kind of held, right ?). In that case, you'll need to change your breasts buoyancy up to 100 so the breasts keep looking realistic since the "hold still" body physics makes the breasts look straight and not affected by gravity.
With time, other Accessories will be included in the Proud Girls, either made by me or by other people. Or even by yourself if you feel able to script an Accessory ! There will be an agreement , a template, exactly like in the RealRestraint line.
Physics
The Proud Girls of course react exactly like the vanilla Lara breasts with physics, and three physics wearables are included in the box : "nude", "covered" and "hold still".
As the name implies, wear "nude" when you are not wearing anything to cover your breasts, or maybe a bikini top, something that doesn't hold the breasts at all. If you run, your Proud Girls will swing and bounce pretty much like on the animated picture at the very top of this blog post.
Full disclosure, I had to make a special physics wearable for this animated picture, because I was running in place so I didn't have the movement of the body to make the breasts swing like this, but this wearable would not be good for every day use so I'm not including it. If you want it, you can IM me and I'll be happy to send it to you for free.
Wear "covered" when you're dressed and your breasts are held by a bra or a corset, or a tight enough top. This physics wearable damps the movements of your breasts as if they were held. You can wear "covered" atop "nude", SL takes into account only the physics wearable you wear last. Personally I have made a script that lets me switch shapes and physics by the press of a button on another HUD, that change implying a different breast size, buoyancy and cleavage, with a "covered" physics worn over the "nude" one when in "covered" mode.
Wear "hold still" when you don't want your breasts to move at all. Once again, you can wear it atop of "nude" or "covered", and your breasts will become still as statues. This is good if you are wearing unrigged stuff over your chest, or if your top is really stiff. Or even if your breasts are bound in a rope harness, for example.
Disclaimer
The Proud Girls are entirely my own original design and topology (you can check in wireframe with Ctrl-Shift-R that their topology and Lara's topology at similar places are different, the vertices are not placed the same way). The only thing I used from the Maitreya dev kit (that I own) is the weights of the mesh body, which is the way to design fitted mesh clothes in the first place, and of course the overall shape of its chest to ensure the Proud Girls fit it perfectly without clipping through or leaving gaps. As for the UV map, I used the standard avatar's and tweaked (a lot) until it fitted perfectly. It was not so hard actually, as Lara also uses the SL UV map and I was pretty close at first try.
Same thing for the scripts. Although I wrote the second version of the scripts of the Lolas Tango breasts a few years back, not a single line of code was copied from them. I did reuse a few ideas I had back then though, like the ability to swap layers, which is very handy and natural.
You could think I am hijacking Omega's channels but I'm not, in fact Lolas was using those channels first, and so was I when I took it upon myself to make the second version of the Lolas breasts. Omega arrived only a couple years later by using the very same channels and the very same protocols, and expanding from there (in a different direction I might add, which complicates matters for those who want to make a Lolas + Omega compatible product). Omega added a feature to support Tattoo-related appliers, seemingly on another channel that I don't know about, which is why the Proud Girls do not support applying directly to the Tattoo layer.
I am also not trying to compete against Onyx LeShelle's Maitreya Lara mesh body at all, nor am I denigrating her work in any way by making a mesh body part specifically for Lara. I love the Lara mesh body and have been using it for over a year now, and am not looking back. The Proud Girls are made to complete it, not to compete against it or even to replace a faulty part. I love Lara's breasts shape a lot too, I just wanted to make a different and bigger shape. Oh and to clear any doubt, I am not at the moment considering making and selling a mesh body, let alone a clone of Lara. If I ever entered the mesh body market in the future, it would be with my own original design and vertex weights.
That's all for the manual, thank you for reading this far !
Have fun !
Marine
PS : Naturally, the appliers (bikini, bodysuit...), phone and hair are not included.
PPS : I'm blonde now, I hope you like it ^_^




 Posts
Posts

