Today, I am releasing a product I had been wanting to make for a while : the Cloak Of The Initiate !
Initiate to what ? I'll let you decide for yourself.
To put it simply, this cloak is designed to hide your body, no matter the bondage going on underneath, and still look inconspicuous. For this, the front and the back of the cloak are quite far from your body so your arms remain concealed (but not enough to make you look fat). Look for yourself, the presets first :

Black rubber. Believe me, it's hot in there !

Black magic, sparkling and suggesting your body underneath

Clear, dry plastic

"I'm singing in the rain..."

Bubbles plastic. Pop... Pop... Pop-pop-pop-pop !

Brown fur. Is this a Jawa ?

Red wool, when it's chilly outside

"Blue jean, I just met a girl named Blue Jean..."

"Black velvet with that slow southern style..."

"Nights in white satin, never reaching the end..."
Those are the ten readily available presets, but there are more materials that you can use...

Rough leather

Leather

Patent leather

Latex

Polished latex

PVC

Plastic wrap (but it doesn't have to be transparent)

Knit
Before you ask, the colors and opacities are completely independent from the materials used. You are free to wear green sheer knit, black opaque plastic wrap, white transparent leather (does such a thing exist ?), and so on.
Hidden bondage is fun. Imagine yourself in a public place, wearing only this cloak to hide your tightly bound, naked body from the outside world, your gagged face invisible in the shadow of your hood... and brought to a shop with the instruction of getting it done under half an hour, because the cloak will open by itself after that delay, and there will be nothing you can do to prevent it...
In fact, this cloak is not only designed for hidden bondage, it can be used in other non-kinky RP settings, as it can be customized to a great extent. Color, opacity, materials even like, for example, clear plastic, wet plastic, latex, even sheer knit if you so desire, and so on. Even glitter !
As usual, this blog post serves both as a demonstration showing what this product can do, and a manual showing how to do it once you own this product. If you want to read the manual, scroll down to the "Manual" section.
So what can you do with this cloak ? First of all, you can open it (or someone can open it for you) and even hide it :

Closed

Ajar
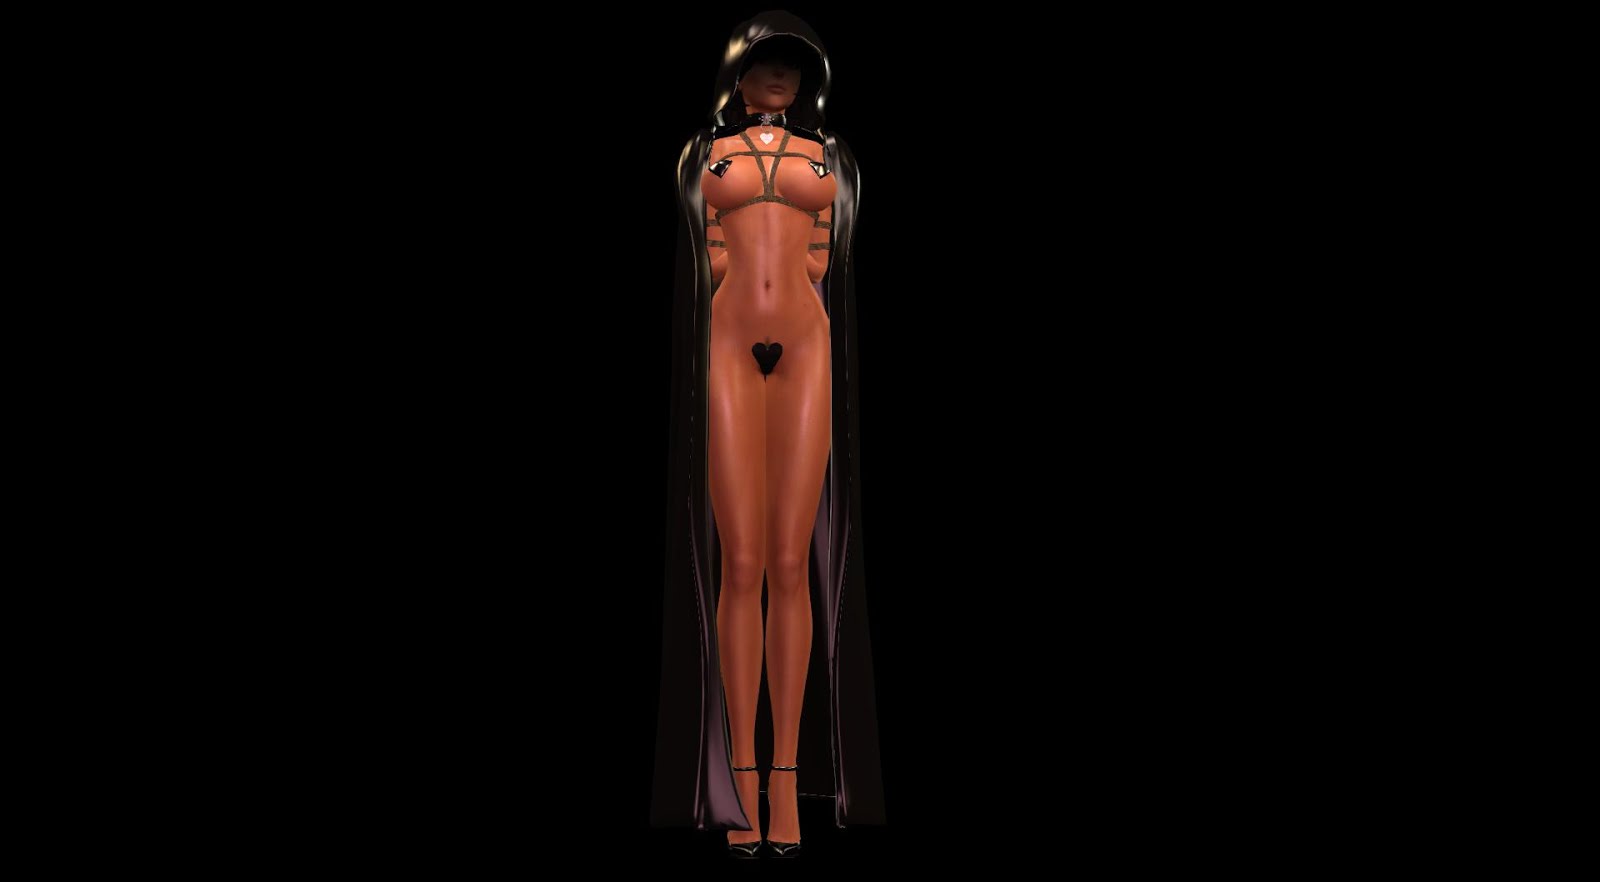
Half-open

Open

Hidden (but it's still worn)
Or you can change its opacity, making it sheer, transparent or even practically invisible. Notice how the face shadow becomes more transparent, or is even hidden as the opacity of the cloak is reduced :

Opaque, nothing shows through

Sheer, you can barely guess the body underneath

Vaporous, it's starting to show, but is more suggested than displayed

See-through, notice there is no more face shadow

Transparent, ok now we see everything

Clear, it's barely there
Please note that only the opaque setting has a shadow map, the other transparencies levels do not and look more plain. I'm considering adding a slightly transparent shadow map for "sheer" (the second level) later. Don't worry, if this happens I will issue an update, which will come at no cost for you.
You can change its color, among the 26 colors I use in a lot of my products, or choose your own custom one. If you are familiar with the RR Deluxe Straps, RR Vixen set and so on, you see what I mean :

White

Blood

Yellow

Lime

Navy
I don't need to go on, hm ? I think you get the point.
More interestingly, you can change the material of the cloak. It is made of rubber by default but you can turn that into PVC, latex, plastic, or even leather, wool, fur, knit, jeans... You have 18 materials at your disposal, as you saw above.
Oh and if you really want to see if they shine dynamically, no problem ! Here I am squirming in wet plastic for you :
Of course, to see materials you need to turn on Advanced Lighting Model in your graphics preferences. See the manual section for more info.
Nothing keeps you from making your own textures and/or materials and applying them onto the cloak manually, but be advised that the script is (for now) not able to load its data from a notecard. In other words, it has to be manual and if you modify the textures and materials through the script, you have to re-apply your own afterwards. Changing the color is ok though. A good method for this is to rez the cloak on the ground, the four open states (the fifth state, "hidden", is not linked to any mesh, it just hides the whole object) being one mesh object each, placed in a row. The Ambient Occlusion and UV maps are contained in the box to help you design your own textures (*).
You may have noticed on the pictures that my face is hidden from sight, there's a black shadow blocking the view. It just so happens that this shadow can be made dimmer, or completely opaque, or even invisible, revealing the face :

Opaque

Strong

Medium

Light

Dim

None
The shadow automatically adjusts if the opacity changes, naturally, so you don't get nonsense like an opaque shadow inside a transparent hood. It also adjusts with the level of openness of the cloak, if it is open enough the face shadow is reduced.

This is how the Opaque face shadow looks when the cloak is half open
Please note that there is a known bug, one that I will probably not be able to fix since it is a rendering issue. When the shadow is not invisible and the opacity of the cloak is "sheer" or "vaporous", the inside of the hood does not show (more technically, the surface showing the face shadow occludes the hood behind it, regardless of its transparency). This is due to the SL viewer hiding a partly transparent surface behind another when both are rigged, in our case the inside of the hood behind the face shadow surface. To mitigate this, the shadow can be completely hidden by pressing "None", or by choosing one of the three most transparent opacities ("see-through", "transparent" and "clear").
Now, this is all good and well, but you can't always let the wearer keep control on her cloak, right ? It just so happens, it can be locked. And even timered. And its access can be limited.
For example, you may want to keep your girl hidden inside the cloak and not let anyone else but you open it, and of course not let her take it off. Simply lock it and set the access to "keyholder only" (that's the default), and voila !
But you can also let just anyone (except your girl) open the cloak to see what's inside, that's just as easy.
As mentioned above, you can also decide to let the cloak unlock itself after a set time... or even just to open itself or to become transparent without unlocking itself, and then only to unlock after more time has passed. That's right, you can set one timer to do a particular action, then a second timer to actually unlock the cloak.
As you can see, you get a lot of control over who can open and tweak the cloak, whether in public or in private.
You can find the Cloak of the Initiate in any of the Marine's Goodies vendors in-world, it is Modify, Copy and No-Transfer, and costs L$600. The box contains an updater to rez in case an update is available for this product, updates are always free. Also if you ever break your product, rezzing the updater will automatically get you a redelivery.

The pasties, shoes and restraints used in these pictures are not included.
This is the end of the demonstration of this product, the rest of this blog post is the actual manual.
Manual
Let's now show you in detail how to operate your Cloak of the Initiate.
Menu
To control the cloak, whether you wear it or someone else does, simply click near the stomach of the wearer, there's an invisible prim, a rather big cylinder (but it's mod so it can be resized). The menu lets you open and close the cloak, lock it, change its appearance and so on.

When you have full access, you can open and close the cloak (and all the states in-between), change its appearance, lock and unlock it, set the access and a timer. And if you actually wear that cloak, you also have a "Maintenance" menu that lets you reset it.
One of the most important sub-menus is the "Appearance" one, which lets you customize the opacity, the color, the material, the shadow and choose a preset.

Opening
The main purpose of this cloak is to hide and reveal your sexy body by closing and opening respectively. The cloak has five open states : closed, ajar, half-open, open and hidden, as you saw on the pictures at the beginning of this post.
When you open the cloak in the "half-open" and "open" states, the shadow becomes less strong, even an "opaque" shadow will cover only half of the face. And obviously, if you hide the cloak the shadow is hidden too.
You might notice that when the cloak opens, it does not actually hide the former closed state before showing the open one. Instead, it does this in two sweeps. First it shows the new part to show, then it hides the part to hide. That way you don't see the cloak disappear entirely (revealing the girl's body underneath) for a brief moment before reappearing in a different state, that would be awkward.
Opacities

The "Opacity" menu lets you choose whether to make the cloak opaque, transparent or almost invisible. The first three opacities ("opaque", "sheer" and "vaporous") have a shadow over the face because they are almost opaque and only suggest the body underneath, the other three ("see-through", "transparent" and "clear") are so transparent that a shadow wouldn't make sense. Please note, as indicated above, that setting to "sheer" or "vaporous" with a non-hidden face shadow will prevent the inner faces of the hood from showing. This is a rendering issue that occurs with alpha rigged surfaces, and I'm afraid there is nothing I can do about it at the moment. In practice though this is not too annoying when the shadow is set to "opaque" or "strong" as you don't really see much through it anyway.
Oh, one thing to keep in mind. When you apply a texture onto your body under the cloak, let's say a bikini over your mesh body, make sure to make that texture masked (on the Maitreya mesh body it is called "mask mode") like I did with my pasties on the pictures here. Otherwise the cloak will not allow them do render if it is transparent. Once again this is the rendering bug we between two transparent rigged surfaces, one hiding the other.
Colors

The "Color" menu allows you to change the color of the whole cloak except the buttons (there is no menu for that but feel free to modify their color manually if you want), among the 26 colors I use in many of my other products, be it RealRestraint or Maison de la Marquise ones, to remain assorted. The "CUSTOM" button lets you enter a color by its RGB numbers, either in whole numbers (ex : "128 128 128" for grey) or in vector format (no example for this, sorry, it freaks Blogger out). Entering nothing and clicking "Submit" makes the color totally black.
Materials

Materials are what makes the cloak shine dynamically with 3D textures. For example, a shiny reflective plastic surface will shine depending on what lights are around, but also how the camera is positioned. This is very different from what is called "baked lighting", which is merely static shine painted on the texture, but we don't have that here.
This means that your viewer must be set to render materials, for this you need to activate Advanced Lighting Model in your graphics preferences, as well as Local Lights. And it's not just you, anyone else who wants to see your cloak shine must do the same.

If doing so cripples your FPS (Frames Per Second, the speed at which your viewer renders your view in SL), just deactivate the dynamic shadows like this :

Of course there need to be local lights around, at the very least some sun. If you are in an area without any local lights, the cloak won't shine, obviously.
But back to what the cloak can do. It offers you no less than 18 materials ! No need to detail them all here, you've already seen them in the demonstration above. Please note that some materials such as "glitter" and the "plastic" ones have a slight glow, which makes for interesting effects such as the one you see in the "Black magic" preset, where the body is hinted underneath a sparkling sheer cloak.
In fact, it does not even need to shine to look 3D. For example, the "Wool" and "Knit" materials shine very little while being very bumpy, which shows when lit from a shallow angle.
Presets

Of course you might feel lazy and not want to set the material, color and opacity manually yourself. This is what presets are for, a good start to let you customize just the bit you want. For example, if you want an opaque green wool cloak, simply choose the "Red wool" preset and turn its color Dark green, since the opacity and material will already be correct at this point.
Shadow

The "Shadow" menu lets you choose between different strengths for the face shadow. When the cloak is made transparent or open (or both), the shadow becomes dimmer to reflect the change.
What's cool is that since the face shadow is rigged like the rest, you can click through it. For example to gag or blindfold the girl.
Access

By default, anyone can access the cloak until it's locked. And once it is locked, only the one who locked can access its features, and nobody else. In particular the wearer, who cannot detach it not even edit it with the SL edit tools (RLV required for this).
But the keyholder can decide to give others some access, for example to let anyone but the wearer unlock it (this is the equivalent of "leaving the key" on a RR restraint), or to let anyone open and close it, and so on.
There are four access levels : "Keyholder only", "Keyholder & wearer", "Keyholder & public" (meaning everyone but the wearer) and "Everyone" (wearer included). You can decide to change the access individually for the lock options, the appearance options and the open states.
Be aware that the cloak can only operated by touching its unrigged part, which means if the wearer is bound and using RLV, and her self-touch ability is restricted, she will not be able to access her own cloak, which may or may not be what you want.
Let me insist on one point : when the cloak is unlocked, anyone can access it regardless of the access settings. Once locked, only the people specified by the access settings can access its features. For example, if your cloak is set to "Appearance : Key & wearer" and your owner locks it, then only you and your owner can change its appearance, everybody else will be unable to.
Timer, action

The "Timer" menu lets you decide how long the cloak remains locked (if no timer is set, this means "indefinitely"). This timer runs only while the wearer is online.
After the timer, the cloak unlocks... or not. In fact, you are able to decide what action the cloak will take once the timer runs out. It unlocks by default, but thanks to the "Action" menu you can make it open or close, or change opacity (not all opacities are available due to the lack of room on the menu).

If the action you choose is anything else than "Unlock", then there is a second timer available to you, that will run as soon as the first one runs out (and executes the action you've planned instead of unlocking the cloak). If that second timer is set to something other than zero, the cloak will unlock itself after it runs out.
For example, you can send your girl bound in a shopping mall, wearing only her cloak that you've locked on (with a restrictive access... or not), a 30-minute timer with the "open" action and a secondary timer set to one hour, this will result in your girl hurrying with her purchases, then TPing right back home before her nude body is revealed to everyone. And only one hour after the cloak was opened, it will unlock itself.
It is important to remember that the timers only run while the cloak is locked, and they are reset when it is unlocked, even manually.
More over, the wearer can lock herself too. She has access to the menus and can even unlock herself unless she sets a timer. In practice, if either the main timer or the secondary timer is greater than zero, and if the cloak is locked, then the wearer loses the ability to unlock it until the timers run out.
Bonus
Since the cloak is meant to be worn while bound underneath, and since I've said it was also appropriate for non-kinky play, and since it is not rigged to the arms, there are two free animations included in the box. One crossing your arms in front of you, the other crossing them behind you. They are priority 5 Bento animations so your arms stay inside the cloak at all times.
If you have very generous breasts that tend to swing left and right when walking, that might not be appropriate with this cloak which is not rigged to the breast size (in fact it is not even fitted mesh, it is plain regular mesh, on purpose), as they would clip through it. To fix this I've included a "Hold breasts" physics layer to keep your breasts disciplined and tame.
Since I've been bragging about materials the whole time, the box includes a dim light to wear that will make your cloak shine, if you're not near any local light. This attachment is purely optional.
As mentioned above, the box also contains full perms textures of the shadow maps and UV maps of the four cloak states, so you can design your own textures for it if you like.
Have fun and don't hesitate to flash !
Marine
(*) Little bit of a legal disclaimer : The cloak was initially made by Mesh-It, but I have modified it heavily, added the face shadow, created the three open states (since the original mesh was only closed), drawn the hood lower before the face, added the inner faces, redid the UV maps entirely and re-baked the shadow maps. This means I own said UVs and shadow maps and I do have the right to distribute them, since they are not the original ones. You retain all the rights to your own textures (diffuse, normal, specular or anything you can think of) created for these UV maps of course.
PS : There is an Easter Egg in this cloak... and Ashelia Difference found it first ! Congrats Ashelia ! No I still won't say what the Easter Egg is. :p
PPS : Although I'm teasing about nude and bound girls sent to shopping malls, I cannot be held responsible for any outrage experienced after revealing a nude body in a General area. You are entirely responsible for the way you play.




 Posts
Posts

